Saturday, December 17, 2011

Jabberwocky Cinematic

Jabberwocky - Game Cinematic (unreleased) from Leo Santos on Vimeo.


This is a cinematic for a video game that I pitched at the studio I used to work for. It was fun coming up with the characters and story. Unfortunately the game has been shelved. I have been hesitant to post this, but it's all over the web now so I may as well, right? Perhaps some day it will see the light of day again. I hope it will. I loved working on it.

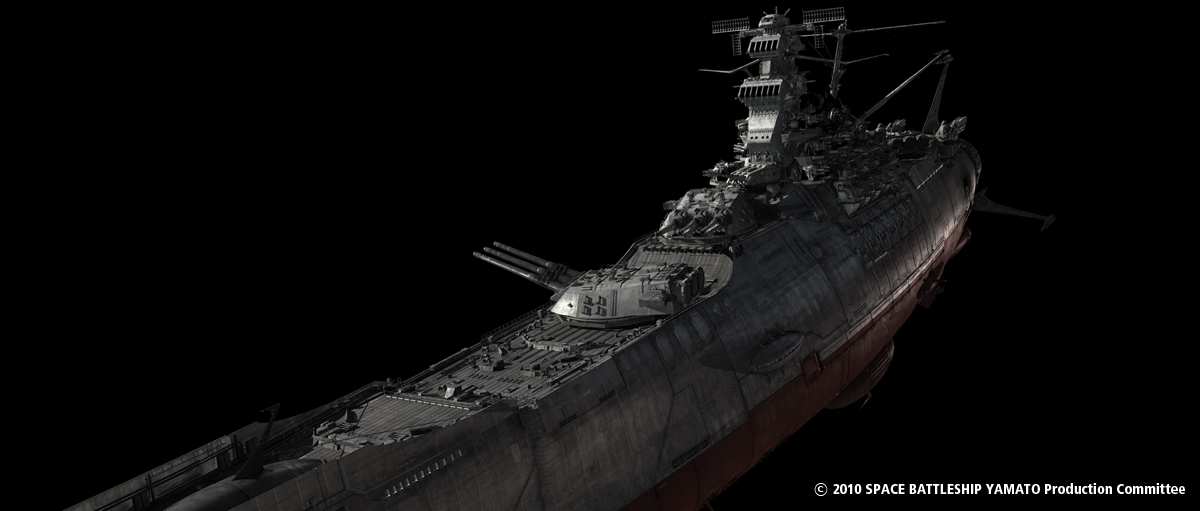
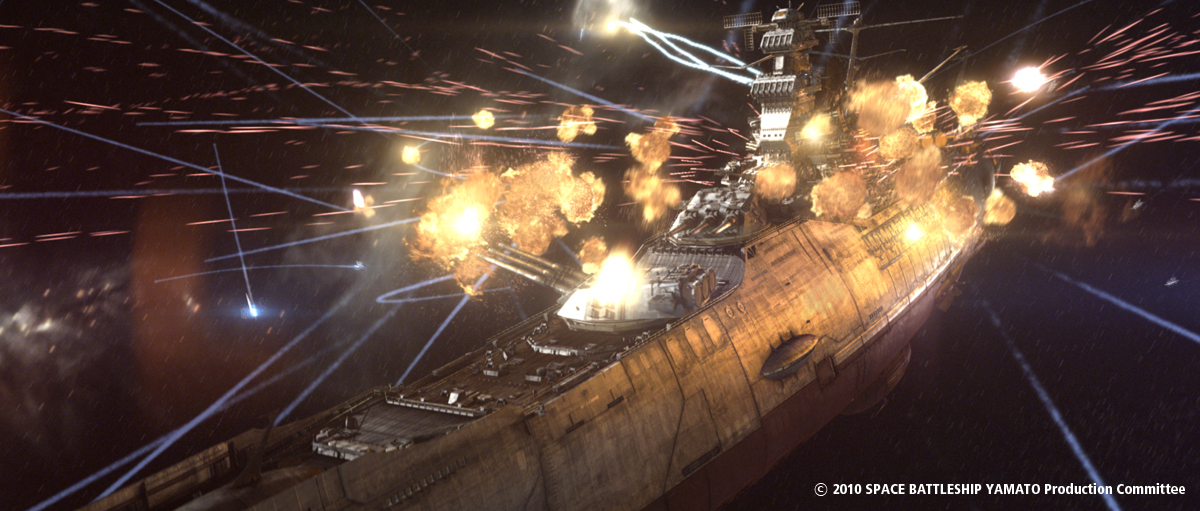
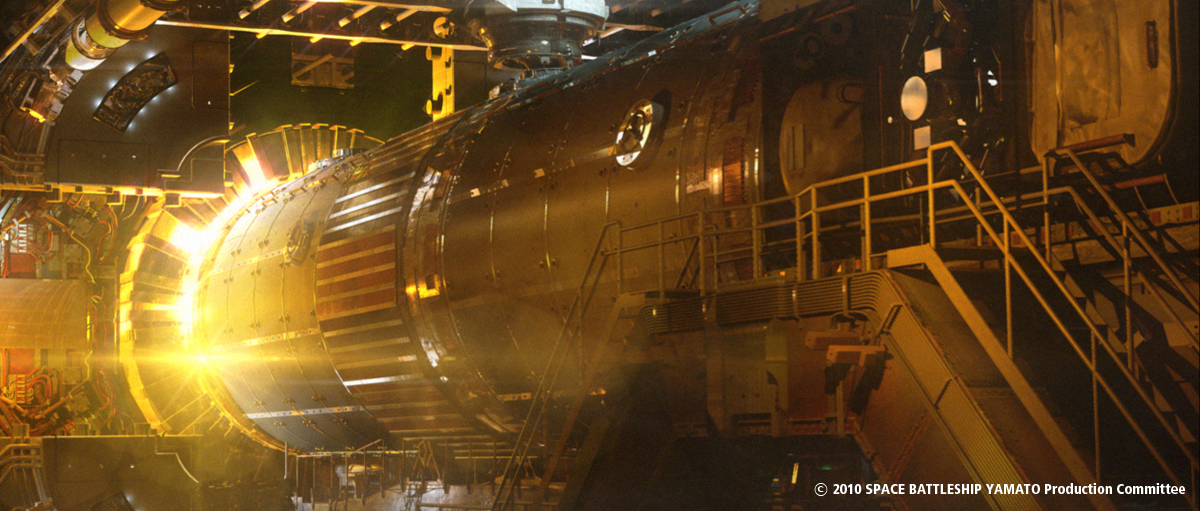
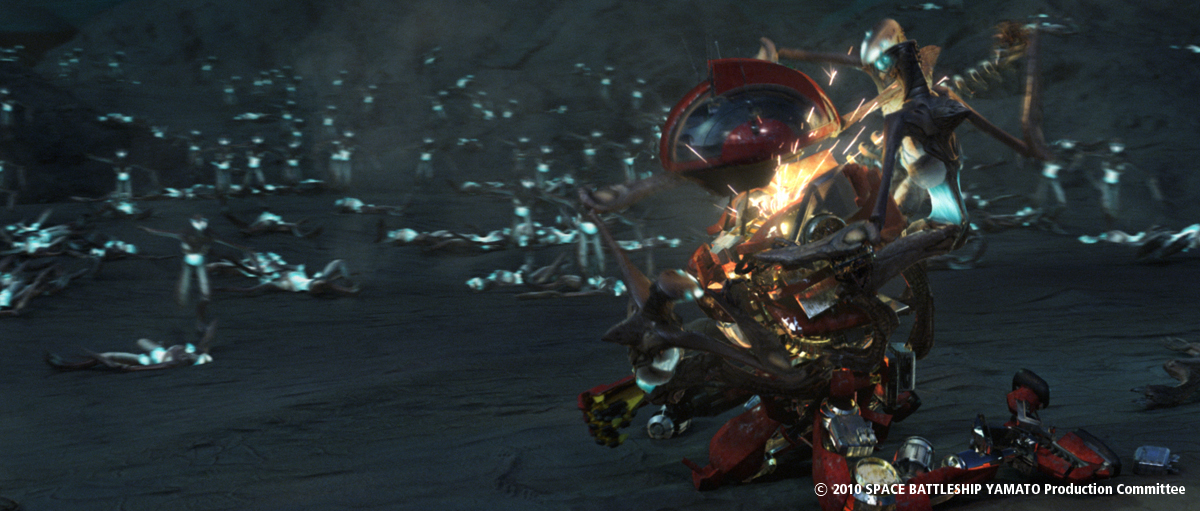
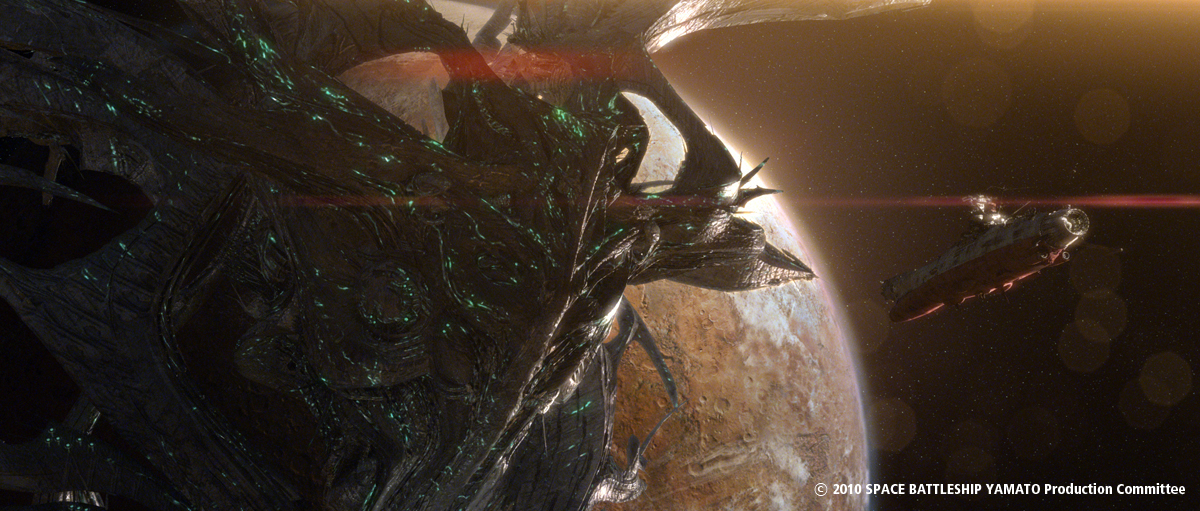
SPACE BATTLESHIP YAMATO: Takashi Yamazaki – Réalisateur & Superviseur VFX – Shirogumi

SPACE BATTLESHIP YAMATO: Takashi Yamazaki – Réalisateur & Superviseur VFX – Shirogumi:


Pour des raisons de temps, cette interview ne sera disponible qu’en anglais. Merci de votre compréhension.


What is your background?

I have been strongly interested in Monster films since childhood, especially, backstage work had drawn my attention, and I had kept thinking how I wish I could make Monster movies when I am older. When I was in a junior high school, I watched two revolutionary films, STAR WARS and CLOSE ENCOUNTERS OF THE THIRD KIND, and my inclinations toward SFX films got stronger. I may add that there are so many people who have been influenced by these two fantastic movies, and I think that many people who are involved in VFX and CG are close to my age.

A few years later, I watched the making of STAR WARS EPISODE V: THE EMPIRE STRIKES BACK on television and made up my mind to have a job like this, so I started to widen my knowledge and to improve my skills by obtaining technical books.


In 1986, I entered Shirogumi, a Japanese VFX production company, as a miniature maker. Even though I had worked as a VFX designer on many Films, Commercials, and Event footages, I realized that there was almost no opportunity in Japan to find a VFX job that I wanted to do when I was younger. Then, I decided to create new demand by myself.

I wrote a script with a lot of aliens, spaceships, robots, and time traveling, which is called JUVENILE. This script caught the attention of Japanese production company, Robot, and I made my debut as a film director. After some films, I won several prizes with ALWAYS: SUNSET ON THIRD STREET.


Can you tell us your approach on this space opera movie?

At first, screen writer Shimako Sato participated in this project. I have worked with her so many times, I told her that I would like to help this film in any position because of I was a big fan of the original animation of SPACE BATTLESHIP YAMATO. It will be my pleasure if they use my ideas in any scene.


One day, I got a call that the production crew was looking for a director and they offered me through my experiences of film JUVENILE, RETURNER and DEMON WARRIOR 3.


To be honest, I hesitated to take this position as a director because I was not ready to direct such a dream project, however, I realized that it was a chance to make my childhood dream come true, so I undertook the position with honor.


How did you create the shot that start from the eye of Yuki Mori and stops in a middle of a huge space battle?

Shot of Yuki Mori’s eye was shoot by macro lens with DSLR Canon 5D Mark II. This scene starts from close-up of her face to full body, I took a track-back shot by crane camera with a six axes motion ride with actor. Six axes ride makes reality in shot. We switched CGI actors and aircrafts when the crane stops in the final position.


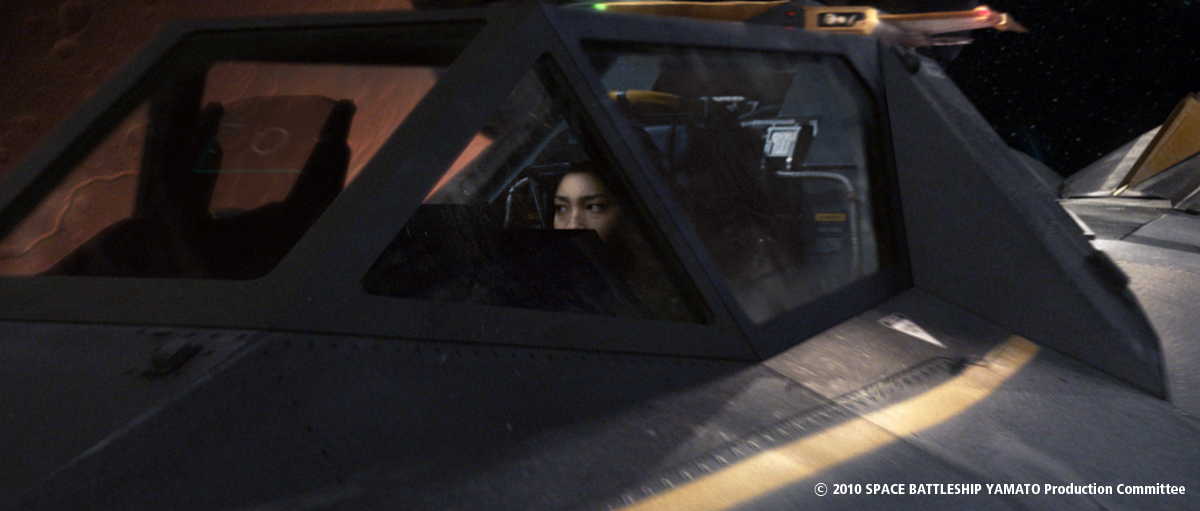
How did you filmed the shots showing pilots in their cockpit?

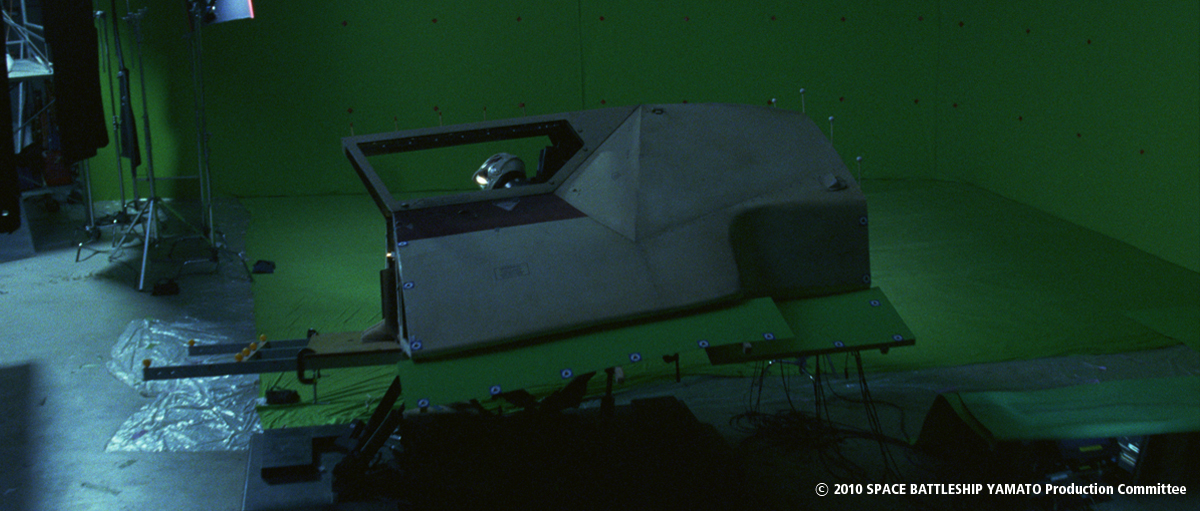
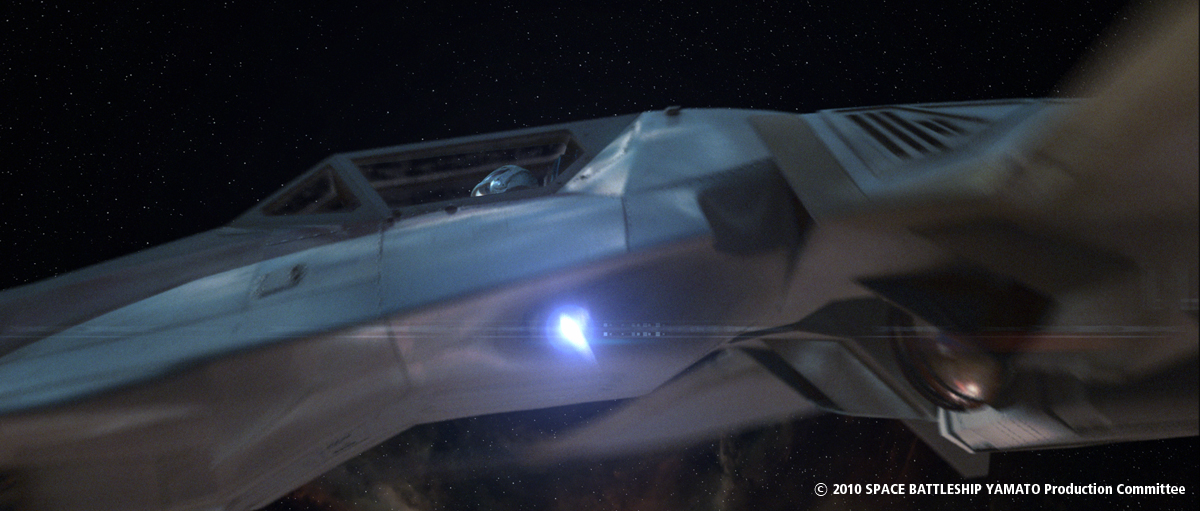
We shot actors on a six axes motion ride set. Motion ride is a part of the set, we created full body by CGI. It was difficult to composite glass on cockpit by complex reflections, we shot with cockpit frames and replaced by CGI.


Did you create previz for the choreography of the space battle?

Pre-Visualization (previz) was a important for such as VFX film.

For actors, I let them imagine the background of the scene. Previz helps them recognize around the shot.

For a stage team, They need to design the stage size of the scene, miniature team also design and create props from camera position in previz.

For me, I need to find a rhythm and tempo for editing film.

For editing, editor needed previz to fill for un-finished VFX shot.


Therefore, I started to work on previz a few month before shooting, and the CG team also created previz for own VFX scenes.


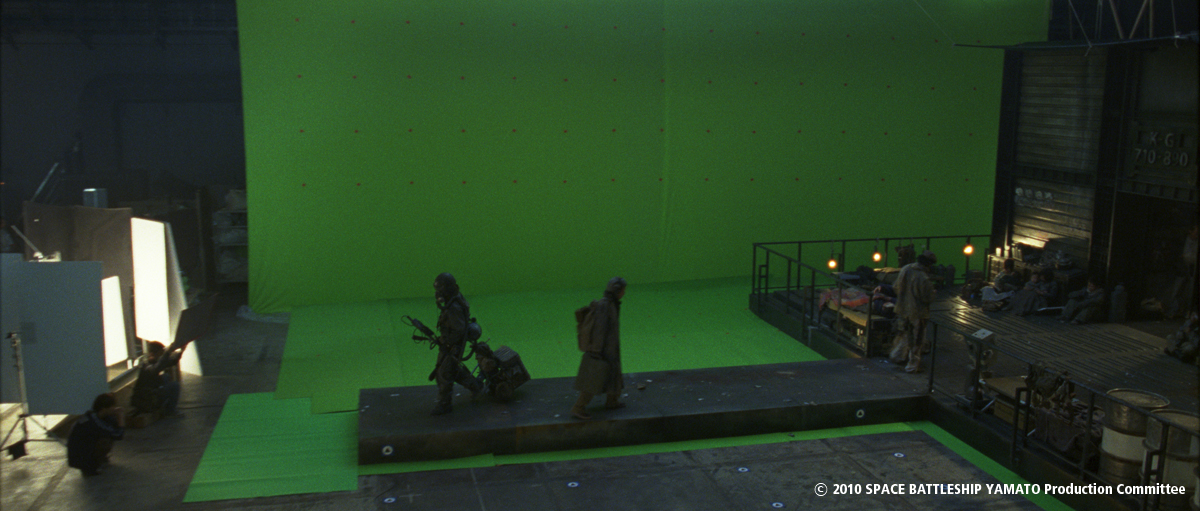
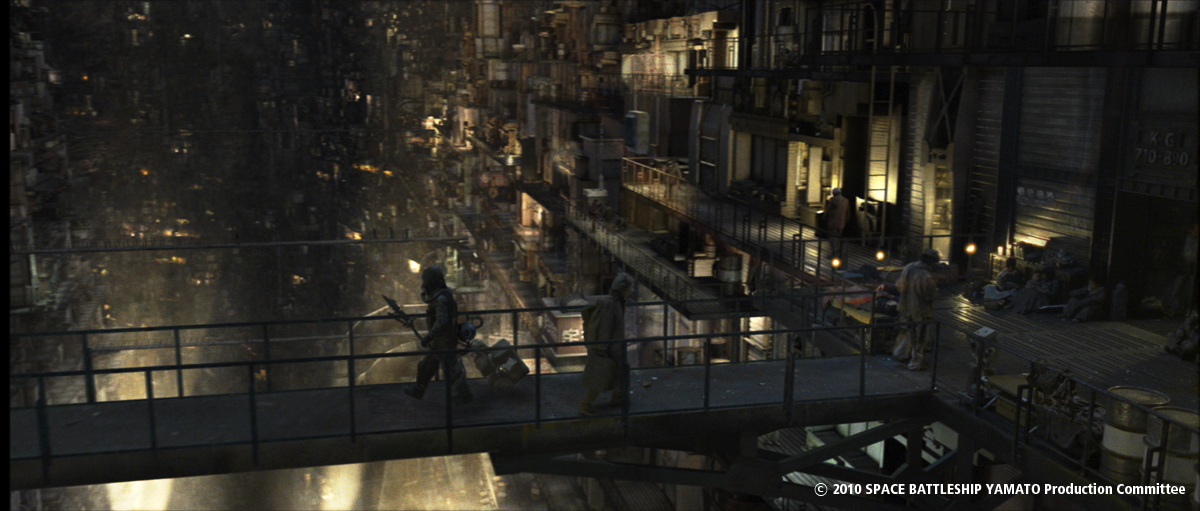
Can you tell us more about the creation of the huge set extension? How did you create them?

It was created by an ordinary way. The camera tracked the minimum sets in front of a green screen backdrop with 2d3 Boujou match move software and we composited with the CGI set.

But there is a problem on the stage size. The actor couldn’t go through left side in the frame. We switched him with digital actor when passing the another actor on the middle.


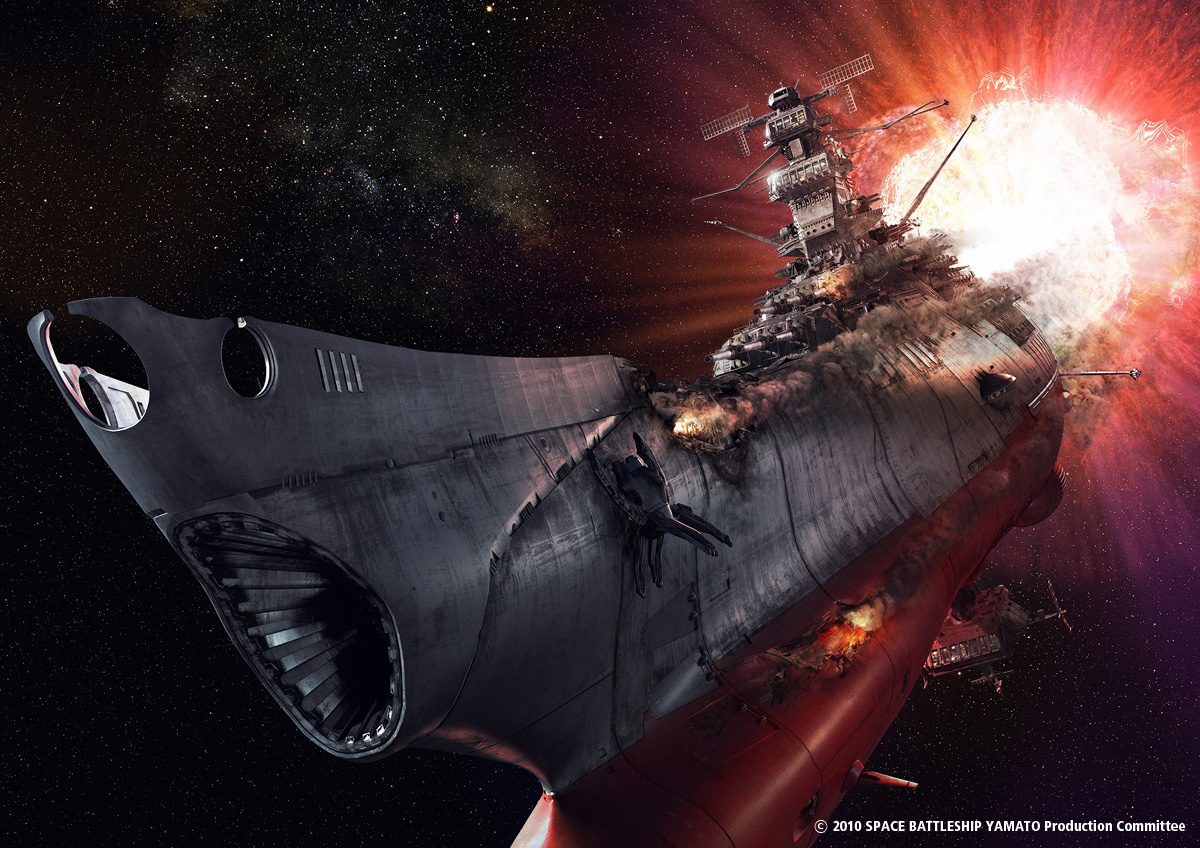
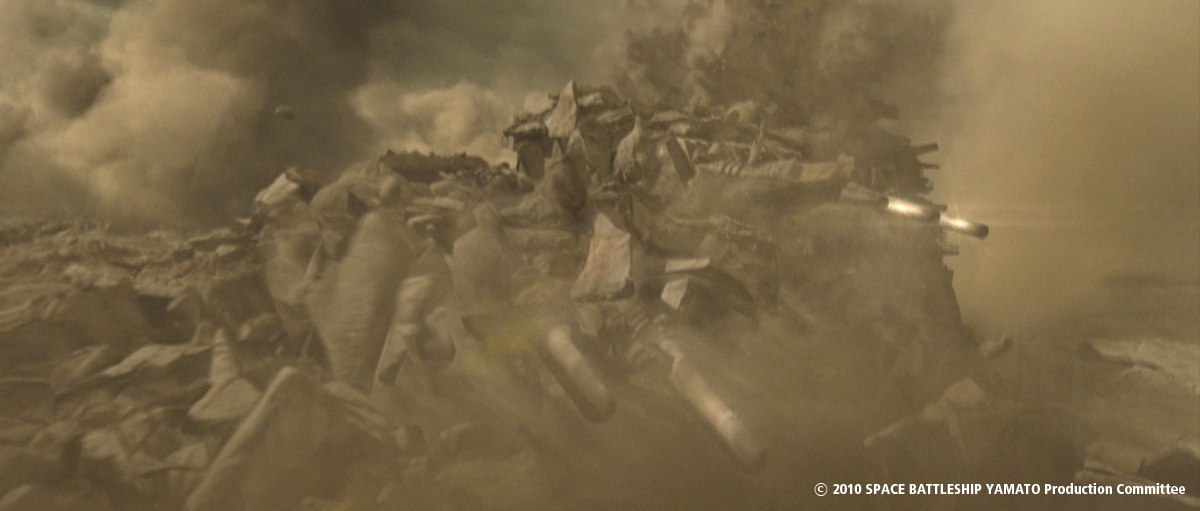
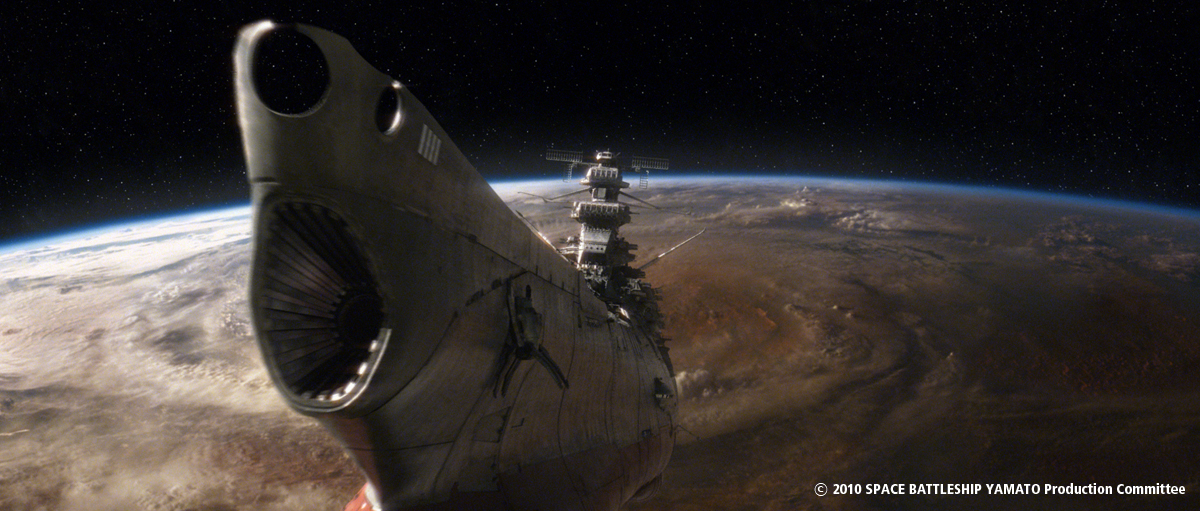
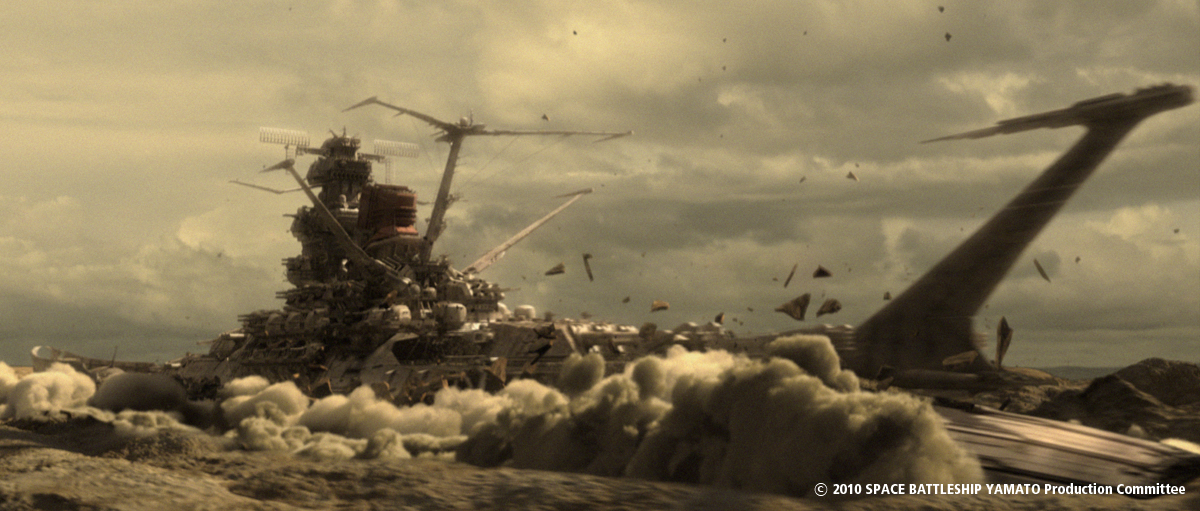
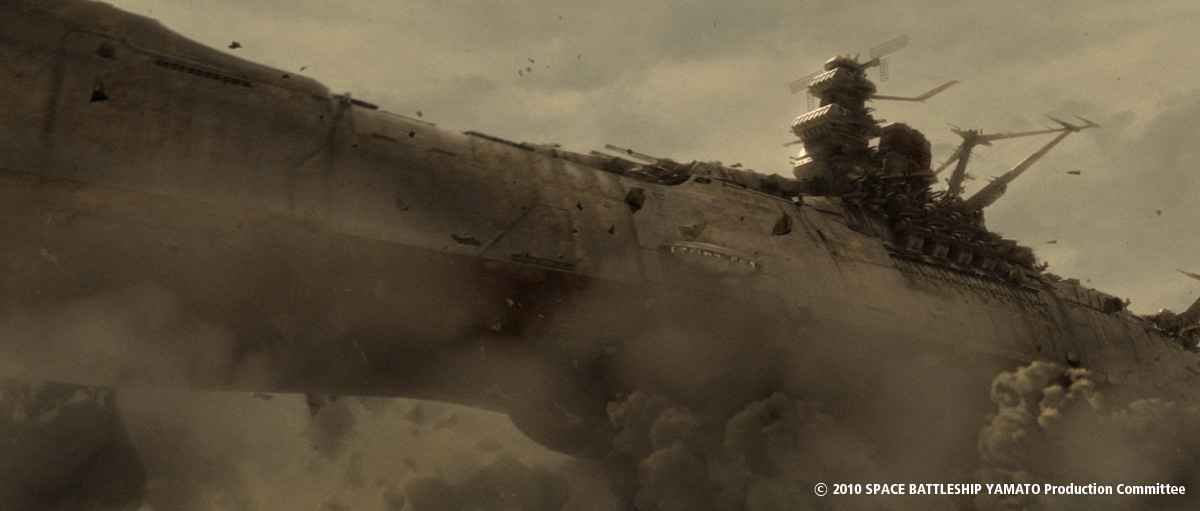
How did you create the impressive shot in which the Yamato is going out the ground?

This scene is the prominent to describe film of SPACE BATTLESHIP YAMATO, I thought this is a very special. However, It was very hard task to for my team who did not have enough effect skills for braking huge objects, smokes. We started with a research for software for braking objects.

After the research, we decided to use RayFire plug-in. but RayFire plug-in is made for 3ds Max and our team was using Maya. We start to learn basic operation from 3ds Max team’s. We were able to use RayFire on 3ds Max exporting FBX from Maya. Finally, we could finish this sequence by the deadline. So, we used 3ds Max as an expensive plug-in for effects.


Can you explain to us the creation of the shockwave and explosion that destroy the enemy armada?

For the explosion of Gamilas carrier, I told my broad intention to Kei Yoneoka, the CG artist whoes specialty is in visual effect. The details of the intention was; « The Engine of Gamilas forms micro-black hole if it gets damaged. At the moment, everything around it is drawn into, but when it goes to the critical point, the engine of Gamilas triggers a large explosion. »

I left everything else to Yoneoka after I expressed the ideal implosion and the timing of release by using onomatopoeia effectively. For more specific information, please go to his website.


SPACE BATTLESHIP YAMATO mother ship destruction makingA from Kei Yoneoka on Vimeo.


Kei Yoneoka: “This shot can be divided mainly mother ship destruction by black hole and huge explosion. Most of them are made with 3dsMAX. I put keyframe animation on the sphere object to control of the timing that black hole begins to occur and speed of rotation. Then I used FumeFX’s velocity information which emit from sphere object to make particle an organic motion. After that I rendered those tens of millions particles by using Krakatoa. When I made a center core of black hole, I used Realflow with computing vorticity then I extracted that information and rendered by using Krakatoa. The destruction of mother ship was done by Thinking Particles.

The huge explosion after shrinking of the black hole was also put keyframe animation on the sphere object to control of the expanding timing. Then I used FumeFX’s velocity information which comes from sphere object to make particle an organic motion. I put a plant or microorganism’s picture to the tens of millions particles as a texture then rendered with Krakatoa. I sculpted emitter object having bumpy shape with modo in advance in order to make an organic style.”


How did you create all those pyro elements such as the missile trails, lasers and explosions?

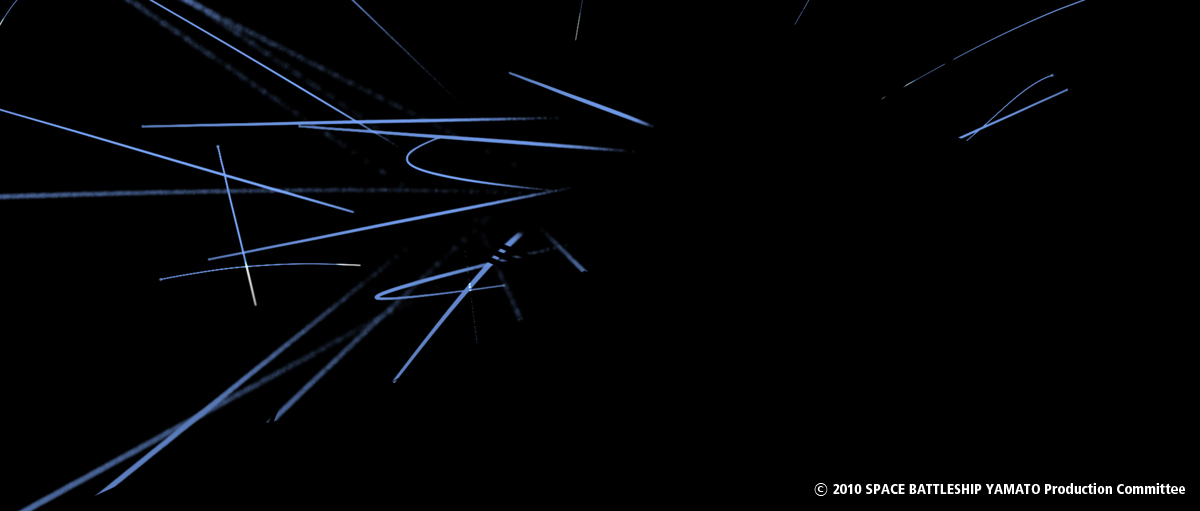
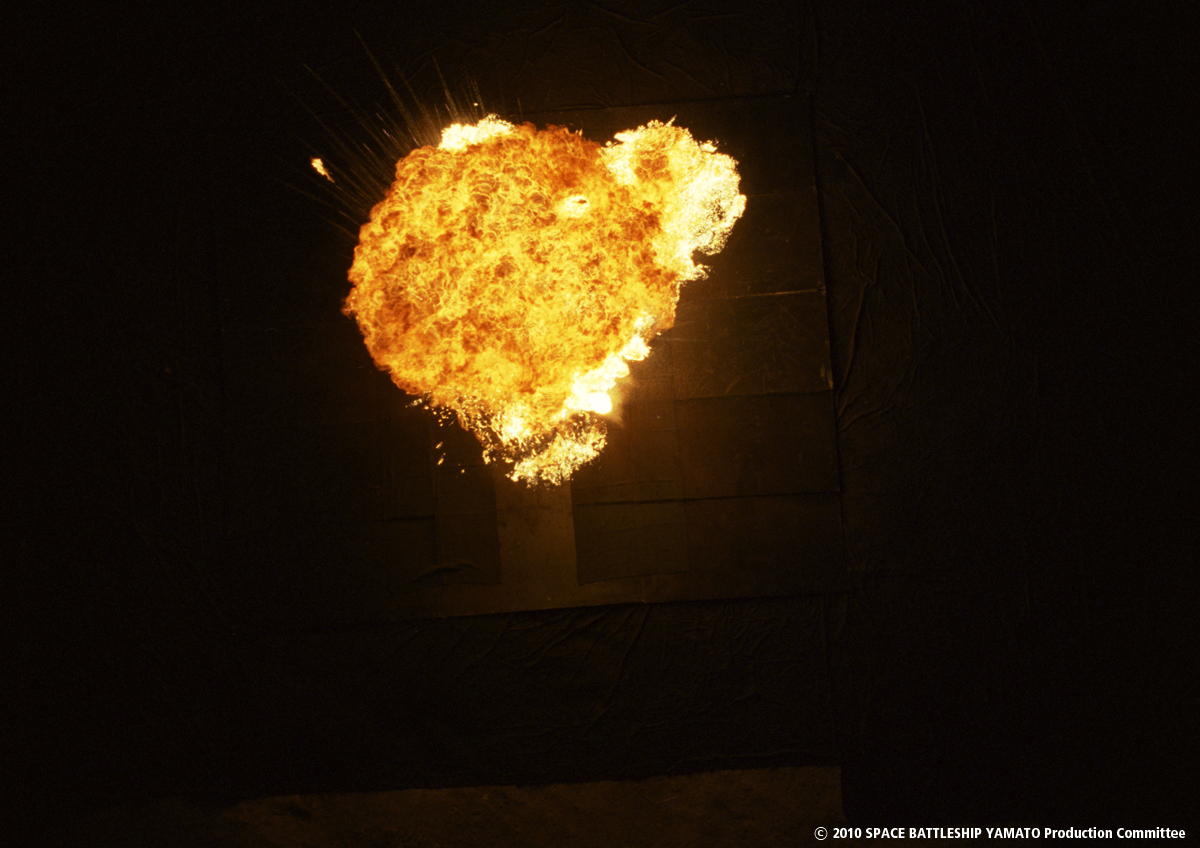
We mostly used N particle of Maya for the pyro elements. I combined a lot of shooting footage on explosions.


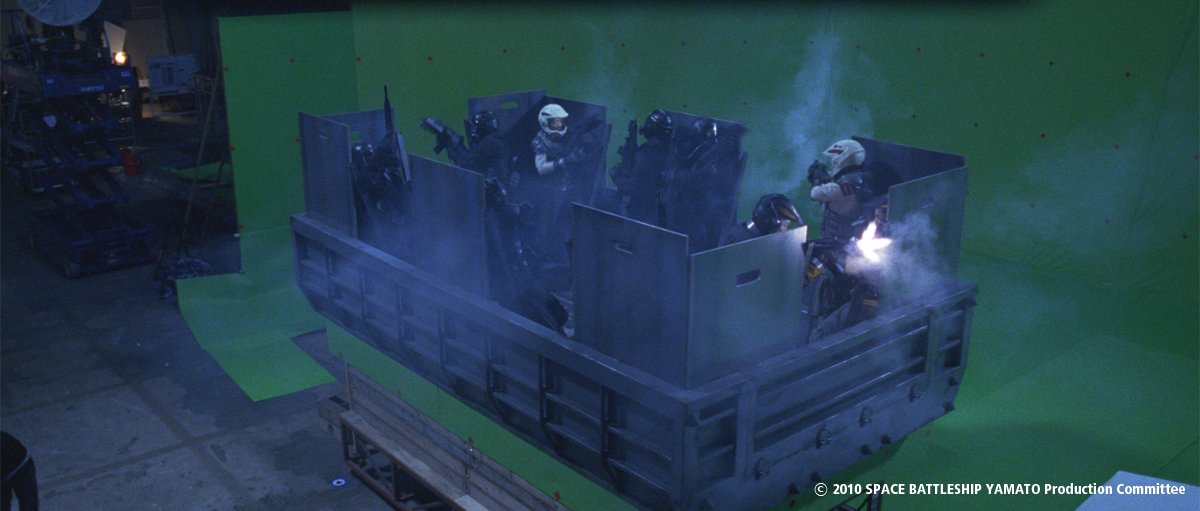
What was the real size of the sequence with the heroes on a truck?

It was very tiny studio. There is a only truck in front of green screen. We shot a crane camera to make it looks like following a moving truck. And we covered CGI elements around truck.


How did you create all the huge environment around them?

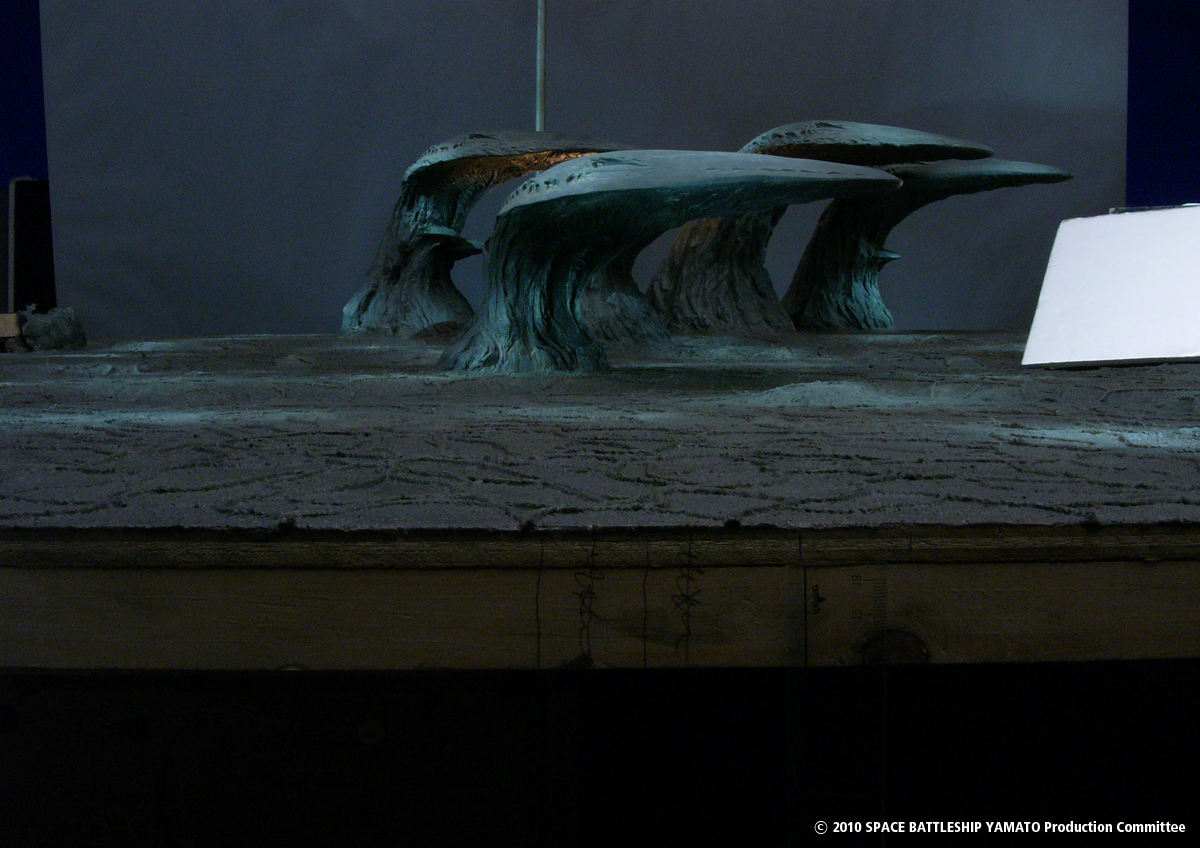
We created the strange rocks using Pixologic Zbrush. We also put matte paintings and photos of miniature for background.


Through the scene, Actors performed arriving in the enemy’s territory and fight with Gamilas fighters, and arrived to innermost place and escape from there. But we shot only truck and some rocks on green screen, we had to create hole backgrounds digitally.


This whole scene was quite difficult challenge for us to create many kinds of backgrounds, but we are confident that the audiences did not realize how little the actual stage size. This is VFX.


Can you tell us the creation of the particles going off Yuki Mori?

We used Maya nCloth for them. We just processed the particle, but I was particular to blew jacket and helmet by the shock of the particles.


How did you create the beautiful final explosion?

The final explosion was also made by a CG artist, Kei Yoneoka whose speciality is in visual effect.

The concept for this scene was to re-create the sad, but beautiful atmosphere of what one of the original piece FAREWELL TO SPACE BATTLESHIP YAMATO depicts and to make it 2010 version. Yoneoka created mysterious and beautiful explosion, which deserved to cap this film, by incorporating marvelous gaseous nebula-like image in an aftereffect of the blast, which looks like supernovas.


SPACE BATTLESHIP YAMATO Final Explosion making from Kei Yoneoka on Vimeo.


Kei Yoneoka: « In this shot, I also put keyframe animation on the sphere object to control of the expanding timing. Then I used FumeFX’s velocity information which comes from sphere object to make particle an organic motion. For the emitter object of the element like a dark nebula, I used gray scale texture which I modified cloud or white cape pictures to make the particles having a natural distribution. Those tens of millions particles was rendered by Krakatoa.”


Did you create specific tools for this show?

No, we did not invent any tools. I focused on employing what we had efficiently.


What was the biggest challenge on this project?

The biggest challenge was that the Japanese described full-scale cosmic space in a science fiction film. Compared with Hollywood films, the budgets are small (I guess one-tenth or one-twentieth.)

And we did not have enough knowledge. I also never done before there are a lot of challenge.

We have been working hard to remind me that Japanese can produce cosmic space feature film.

I hope this experience helps me with next challenge.

The difference between Hollywood and us is not only the budget.

It will be experience, I believe.


Has there been a shot or a sequence that prevented you from sleeping?

We always prepare the knowledge and skills before start project. But this project was started without enough skills to describe such as special effects. It was unprecedented challenge to produce the significant shot of a theatrical released film as learning basic operation of unfamiliar software.


We spent a lot of time for this scene, so I felt really relieved when we finished the shot.


How long have you worked on this film?

We worked on stage for 3 months and 6 months for the digital work.


What are your softwares and pipeline from Shirogumi?

We used Maya as a main CG software, 3ds Max and RayFire for certain scenes. Nuke for compositing, ZBrush for special modeling, Photoshop for matte paintings and Thinking Particles for explosion effect. We used DPX from DI room of IMAGICA, the post production company.


How many shots have you made and what was the size of your team?

The total number of shots were 436 cut.

There were 34 original staffs, 21 people for support and 12 people for motion capture related work.


What do you keep from this experience?

I realized how difficult it was to produce cosmic space films in Japan.

However, I believe it will refine through this kind of project. So, I would like to keep challenging for the new things.


What is your next project?

One of the next project is called FRIENDS NAKI IN MONONOKE ISLAND.

It is a digital animation film based on an old children’s tale (or a fairy tale), which is created with miniature background and CGI characters technology.


http://www.friends-movie.jp/


The other project is called ALWAYS SUNSET ON THIRD STREET ’64.

This is the third series of ALWAYS. We shot with real 3D camera, so it is a true 3D film It is not 2D to 3D converting film. My idea is taking audiences to the three-dimensional world in 1960’s Tokyo.


http://www.always3.jp/


What are the 4 movies that gave you the passion of cinema?

CLOSE ENCOUNTERS OF THE THIRD KIND

STAR WARS series

SEVEN SAMURAI

IT’S A WONDERFUL LIFE


A big thanks for your time.


// EN SAVOIR PLUS ?


- Shirogumi: Page spéciale à propos de SPACE BATTLESHIP YAMATO sur le site de Shirogumi.


// SPACE BATTLESHIP YAMATO – TRAILER


© Vincent Frei – The Art of VFX – 2011


IMMORTALS: Simon Hughes – Superviseur VFX – Image Engine

IMMORTALS: Simon Hughes – Superviseur VFX – Image Engine:


Pour des raisons de temps, cette interview ne sera disponible qu’en anglais. Merci de votre compréhension.


What is your background?

My background was in fine art, and audiovisual technology, but I began working in the industry in London at Cinesite in 1997. I started as a runner, to editorial back in the days when we still cut film, projection and database management for vfx, to scanning and recording where I became the S&R supervisor.


I made a jump to the side after a few years. I had been thoroughly trained in shake during my time in S&R, so I moved over to compositing as I really got the taste for my creative urges again! After just over 6 years I left Cinesite to take a job at Clear Film, which soon became a part of Prime Focus. Myself, and a small team were in charge of setting up the film department and had some great experiences such as working directly with Danny Boyle, and high end productions such as KINGDOM OF HEAVEN.


Again after a few years I moved on to Double Negative working on films like UNITED 93, HARRY POTTER and THE REAPING. After this I moved on to Rainmaker UK, where I was again involved in the early days of a startup vfx company and also transitioned into comp supervision.


As I am a Canadian citizen I have always had my eye on the industry in Canada, and after a couple of years at Rainmaker I took a job at Image Engine for two reasons, they had made the complete transition to Nuke and they were due start on District 9 which was just an incredible sounding project. Once I finished on DISTRICT 9, I received a VES award for compositing and moved into VFX supervision more or less straight after. Working on LAW ABIDING CITIZEN, THE FACTORY, THE LOSERS, IMMORTALS and most recently SAFE HOUSE (2012) where I have been the supervisor for the show working directly with Universal.


How did Image Engine get involved on this show?

Image Engine had worked on a number of shows with Raymond Geiringer. I had worked with him on LAW ABIDING CITIZEN with Visual Effects Executive Producer Shawn Walsh, and we had developed a good working relationship, which lead Raymond to contact us. Tarsem was also a big fan of DISTRICT 9.


How long have you worked on this film?

We worked on this for around a year. Work began in 2010 when I went on set in Montréal.


How many shots have you done?

There were around 130 shots in total.


How was the collaboration with director Tarsem?

Working with Tarsem was a fantastic experience; his artistic sensibilities are what drive his films to become the grand spectacles that they are. So it was a real challenge to try to live up to those standards.


What was his approach to VFX?

Tarsem seemed to encourage creative freedom, we were expected to drive the imagery forward ourselves to a point where the film could be viewed holistically, and this is then where he really got involved. This was great, as he understood that the process takes time – allowing us to develop our ideas and techniques first so that he could then direct them further.


How was the collaboration with Production VFX Supervisor Raymond Gieringer?

Working with Raymond has always been a good experience, he is incredibly calm, and focused, and as an ex-facility supervisor he thoroughly understands the challenges that VFX facilities have to overcome to complete high end vfx.


What have you done on this show?

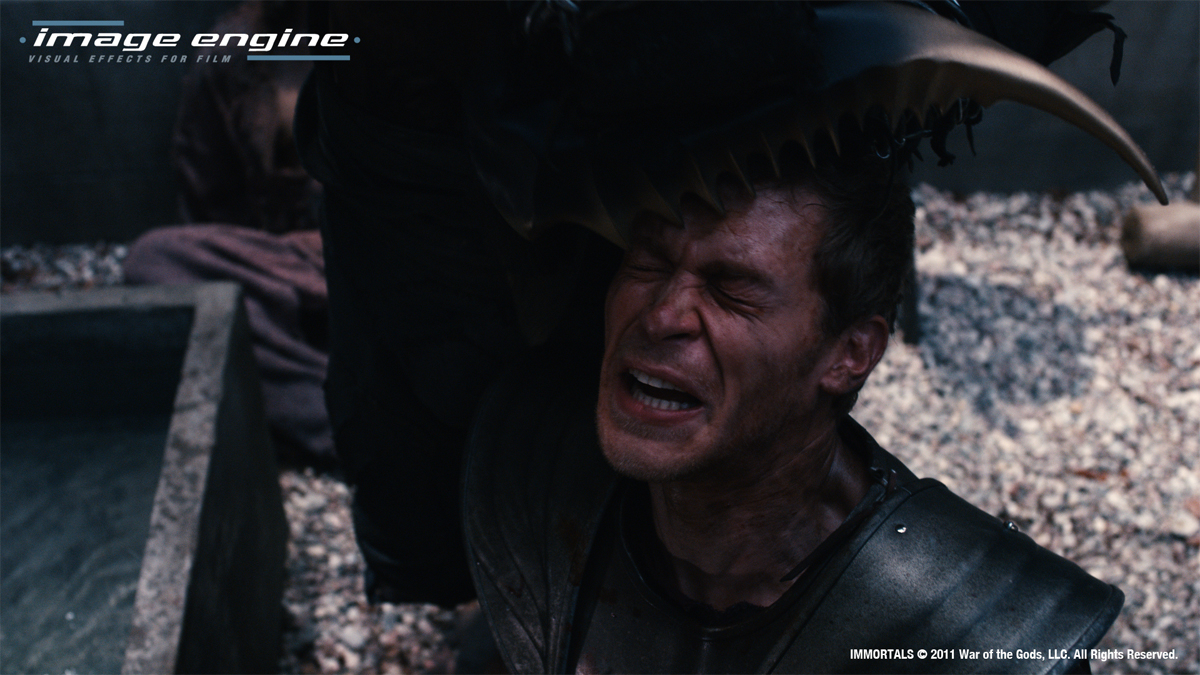
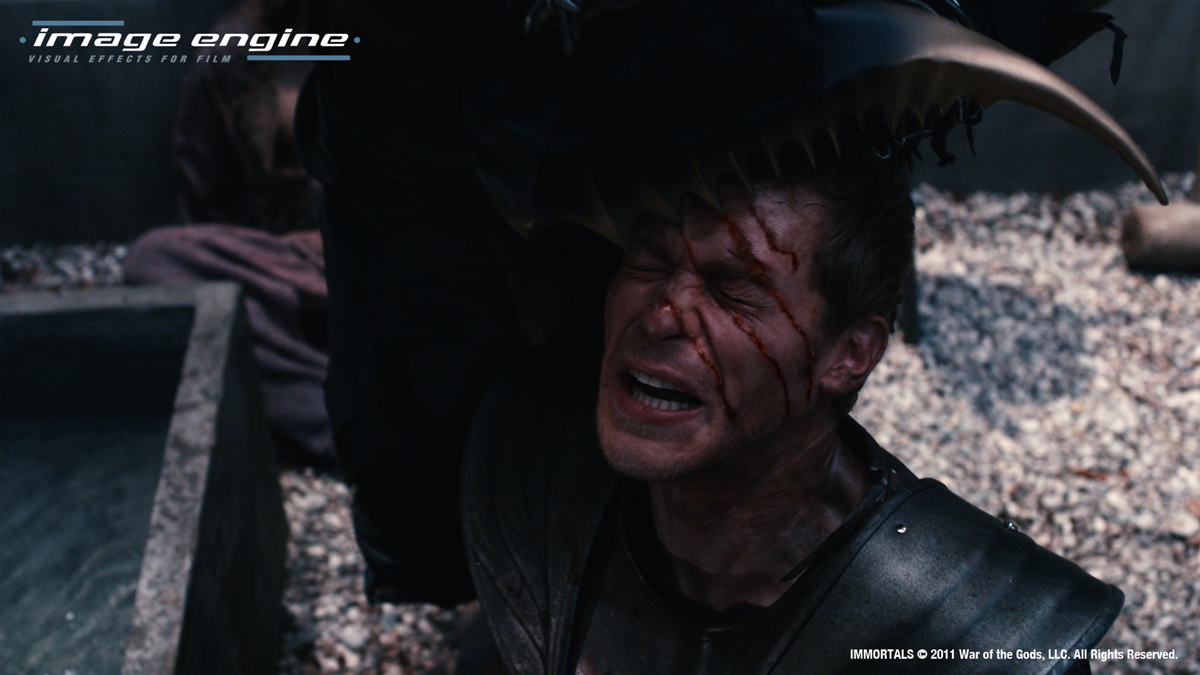
Image Engine provided the full range of visual effects work on IMMORTALS, from computer generated characters, character transitions and heavily stylized digital blood and gore, but the main challenge for the company was definitely the digital environment work.


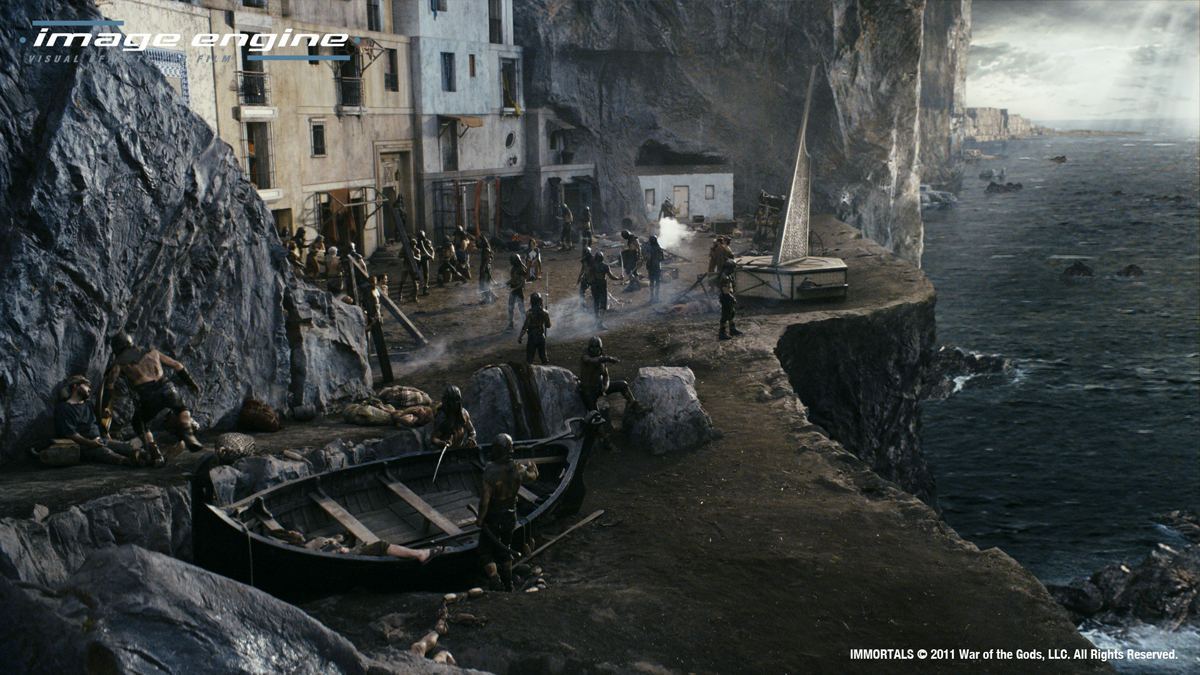
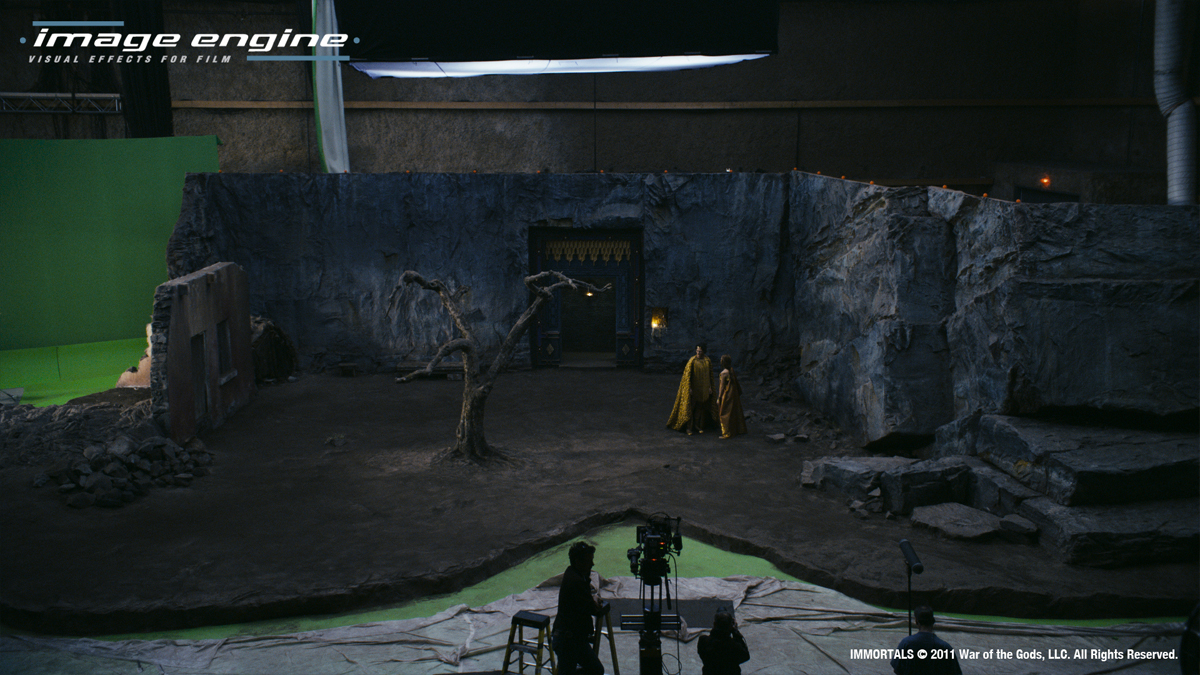
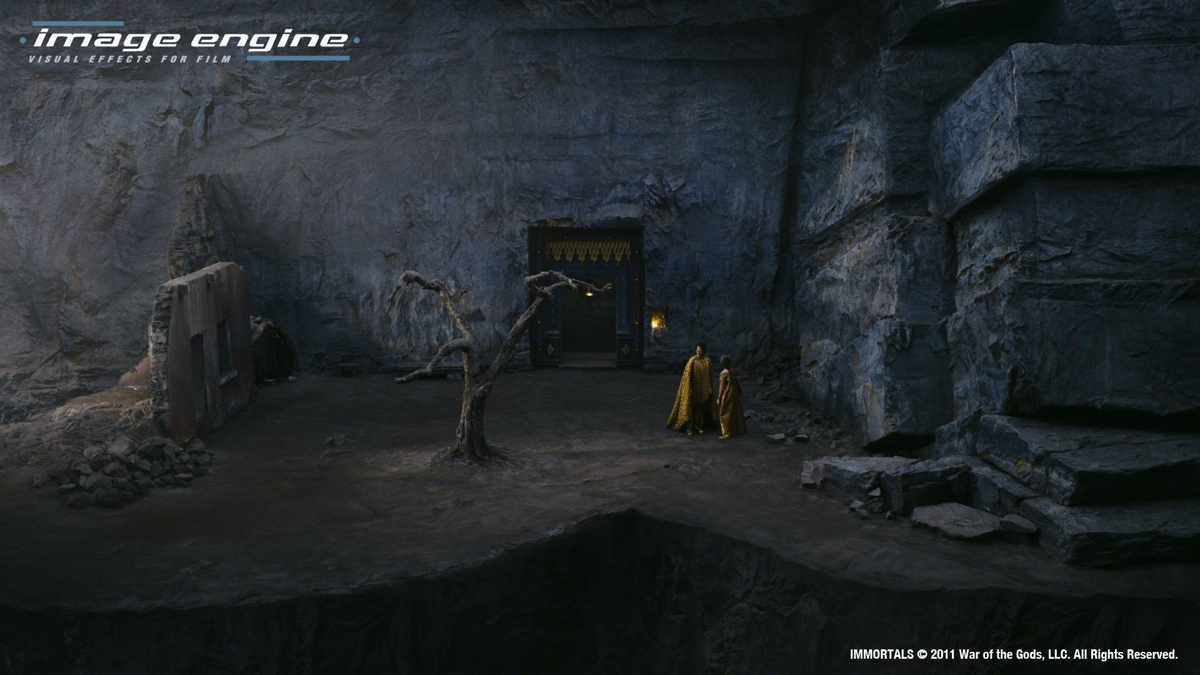
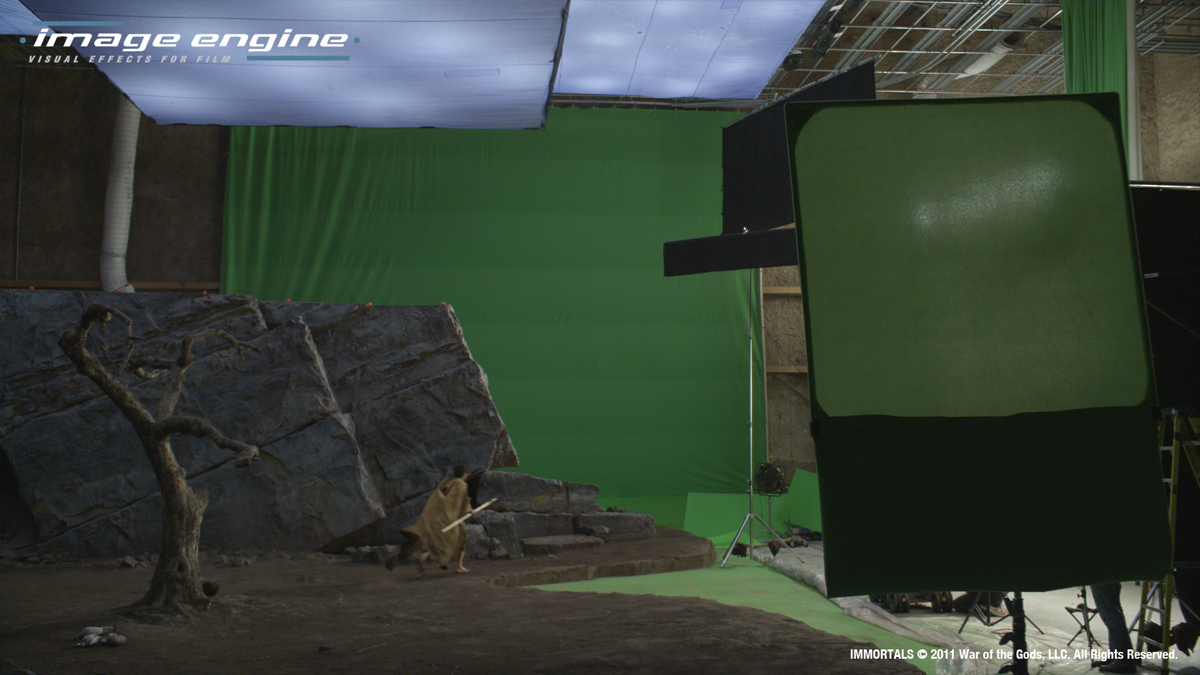
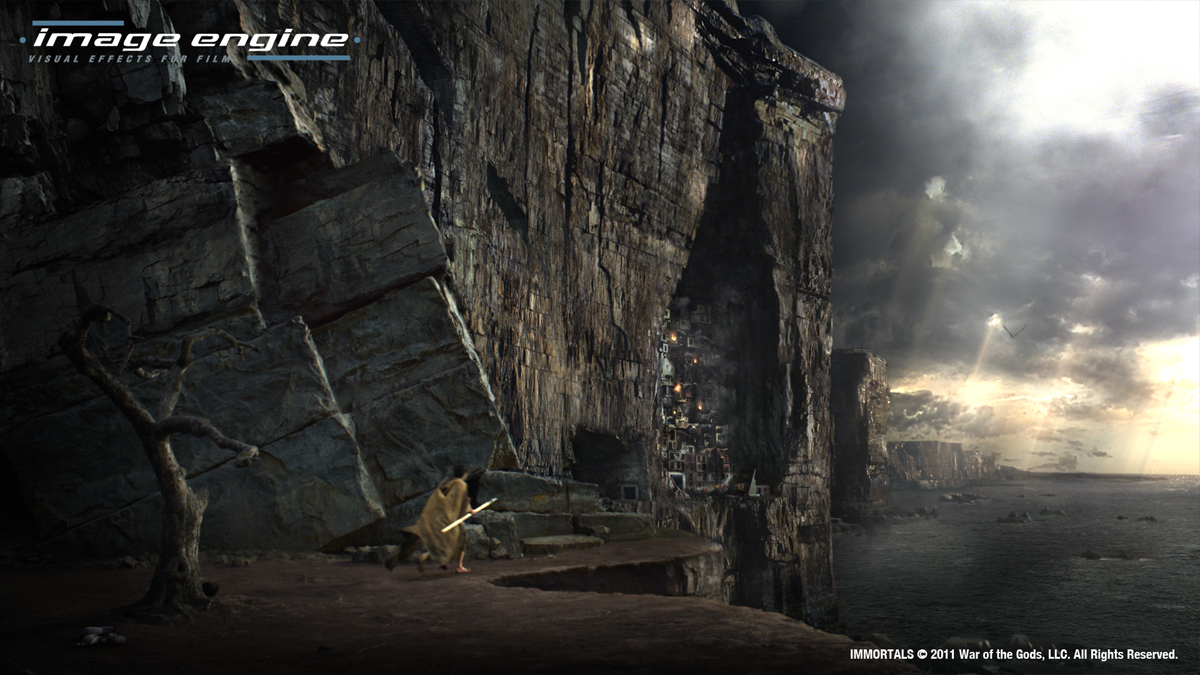
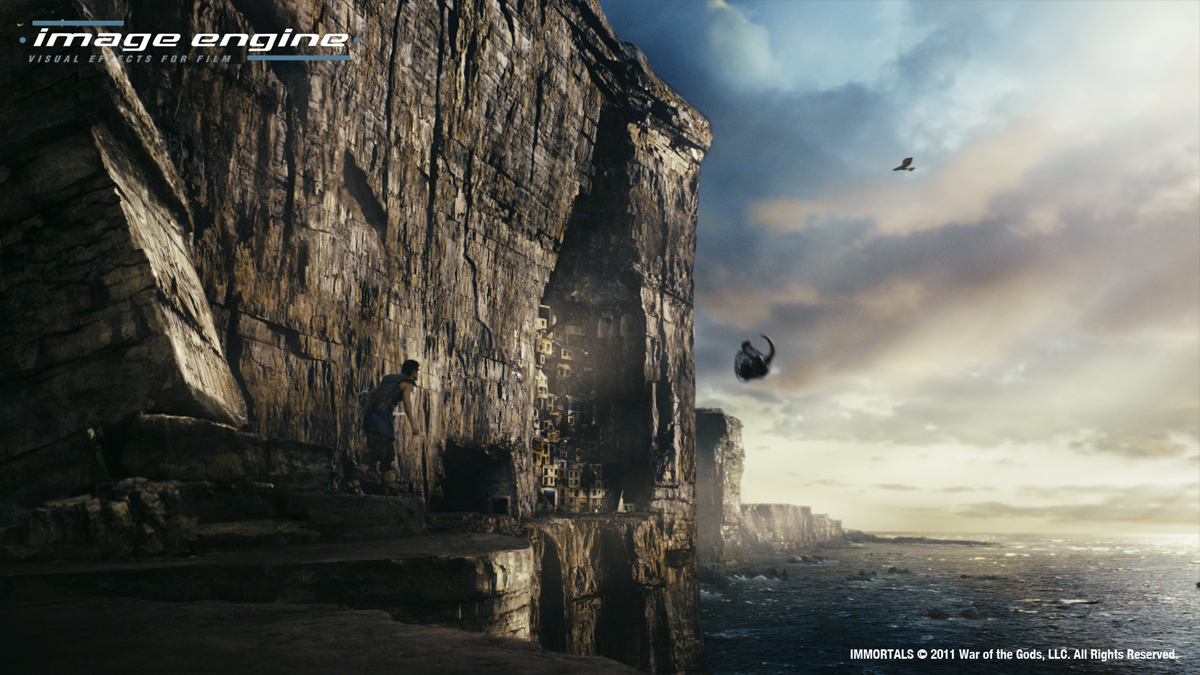
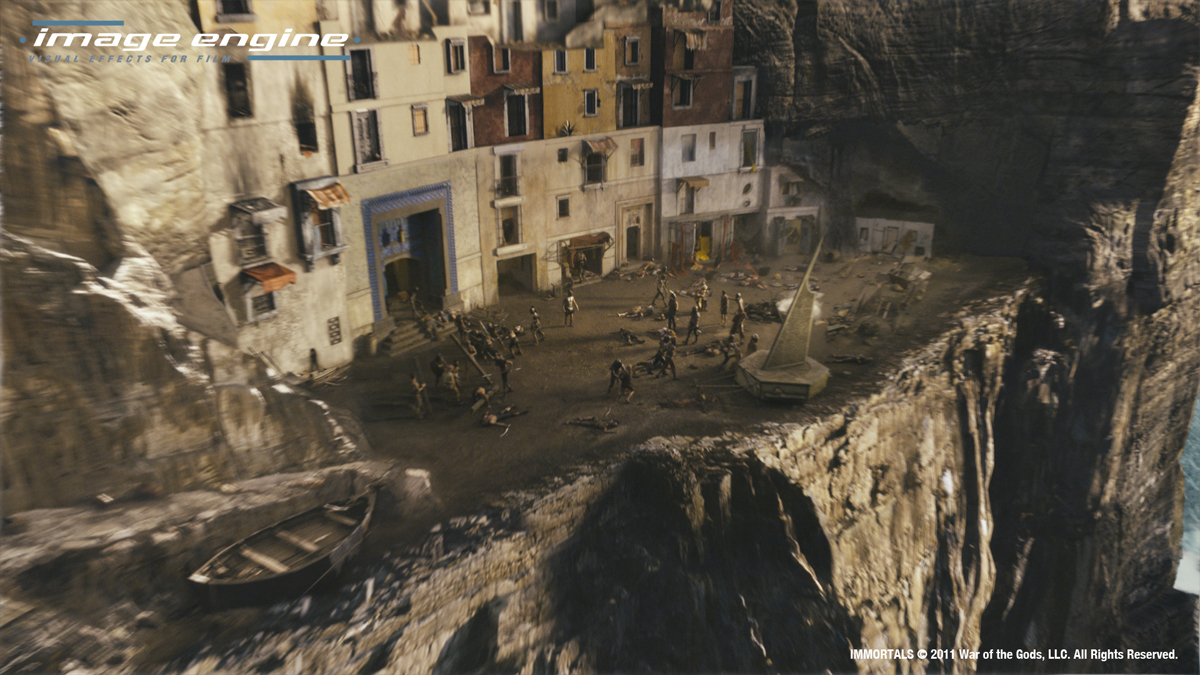
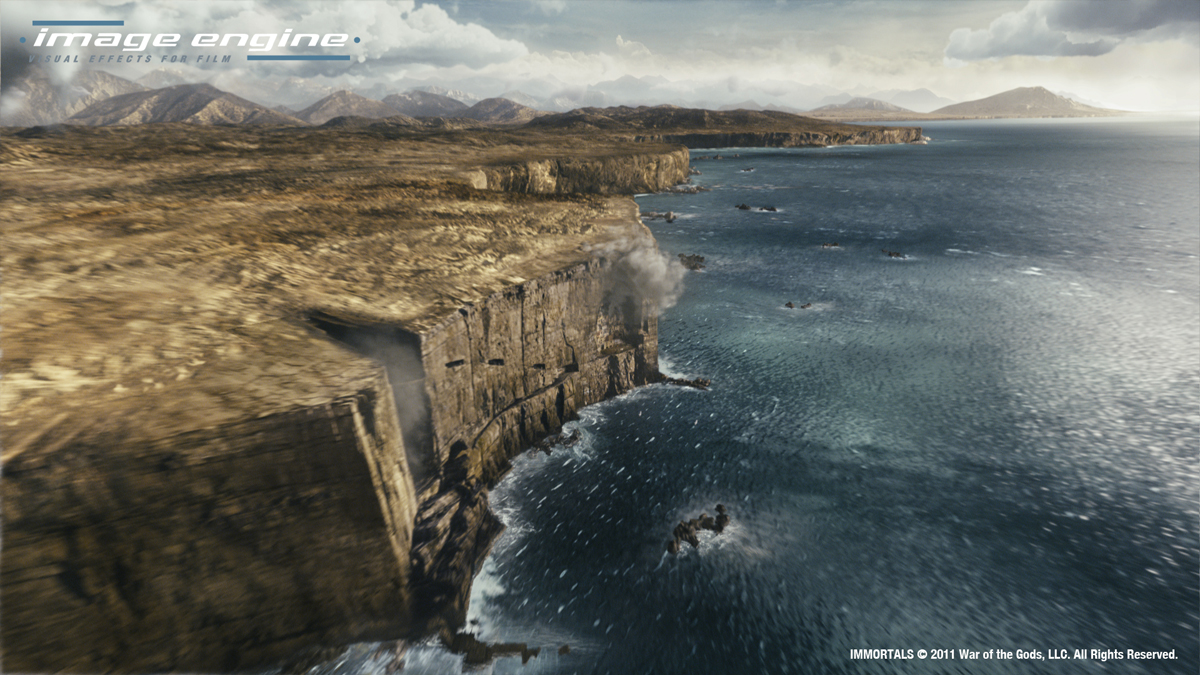
The main environment was the cliff, which stretches for roughly half a kilometer and houses three of the key sets: the village, the tree-bluff and the checkpoint, which are all carved into the rock.


Can you tell us more about the village and the cliff?

Essentially at the start we did a lot of concept art ourselves; working out how the cliff should look and how the village could conceivably extend from the original 3 stories.


The concepts only got us so far, so essentially became more of a case of pushing it forward and trying to visualize it in broad strokes as we were going along, so we could see it in context. The cliff was a design challenge, as it is such a vast and simplified structure. It was all about rock, and the details within the rock surface, which is a bigger challenge than it may sound.


The village extension was also a very creative challenge. We had to find a way to demonstrate depth and scale, and find a way for people to be able to travel between the levels. We also wanted to create a sense of life and organic growth that you see in medieval towns and cities throughout history, where the structures grow around each other over time.


The trick was scale, how to make these things seem vast.


How did you create the first reveal of Athena?

To start with we created a basic human form in Maya that was used to body track Athena, mainly focused on the head and neck. From this we projected a painted version of her head onto the geo, and also created a selection of ink blot styles images that were also used as a basic texture on the geo. From this we were able to supply comp with a CG head and a selection of alpha channels that they could use to drive the effect.


The lower half of the body was taken from footage of the painted Athena and warped to match the practical in Nuke. The reveal were a combination of displaced roto shapes and the ink blot textures, that gradually reveal the unpainted plate version, the goal was to try to create a fluid transform that looked like it was seeping into her body.


How did you design and create the magical arrows?

The arrows started as a CG asset, that was essentially silver with little chips and dents along the body, and a sharp well defined head, and feathers on the tail. Using 3delight to render we were able to give comp a solid arrow as a base and then a selection of aov’s that were used to drive the effect, namely pref, position, spec, reflection and z depth.


The glisten was created from making the spec sharper and crisper and by adjusting contrast taking it just down to small finer details, which is one of the reasons why we made lots of dents and details in the body of the arrow in the first place. This gave us a basic sparkle, that we treated heavily both through combinations of the chromatic aberration, noise patterns, and convolving with glitter imagery.


The transition was driven in part by mapping noise patterns to the arrow using pref, and transition from tail and tip down to the middle using the depth pass and manipulating it values over time. Essentially we created a method that could be applied to multiple shots.


How did you create the Hawk?

This started as a much simpler build as we were only originally expecting to see it far from camera, so over time this was brought closer and closer until it became a hero character. The build was in maya, textures in photoshop and some sculpting in Z brush. The animation was in maya.


Can you tell us more about your work on gore shots?

The gore work went from the simpler adding of practical gore from an element shoot, to creating CG limbs and arms and chopping them off. In addition to this there was a collection of weapons created which ranged from daggers, to swords, to spears, and in one instance one spear is snapped into three different sections and used to brutally maim soldiers as Theseus rampages through the tunnel.


The gore work was a lot of fun; really it was a case of more more more!!


Was there a shot or a sequence that prevented you from sleep?

The environment was a challenge, so as a whole this is the part of the show that left it’s mark on me, and taught me a lot more about how to do this kind of work. I think it kept us all awake at night dreaming about rock surfaces!


What do you keep from this experience?

How to create something of such a huge scale, but at the same time keep it flexible enough to handle the creative process. We work in an industry that calls more and more for well defined procedural approaches, that don’t always lend themselves well to creativity, so it is a difficult balancing act, and IMMORTALS taught me a lot about this.


// SPECIFIC SHOTS IN FOCUS BY IMAGE ENGINE ARTISTS


// Gustavo Yamin, Senior Digital Artist


Can you tell us how you designed and built the cliff?

The task of creating this massive set extension was a multi-faceted challenge that consumed over 6 months of planning, setup, sculpting, rendering, matte painting and compositing.


The production sketch we received from the client provided a rough guideline to the overall « look », and it was clear right from the start that Tarsem wanted stone formations that looked realistic but definitely epic in shape and scale.


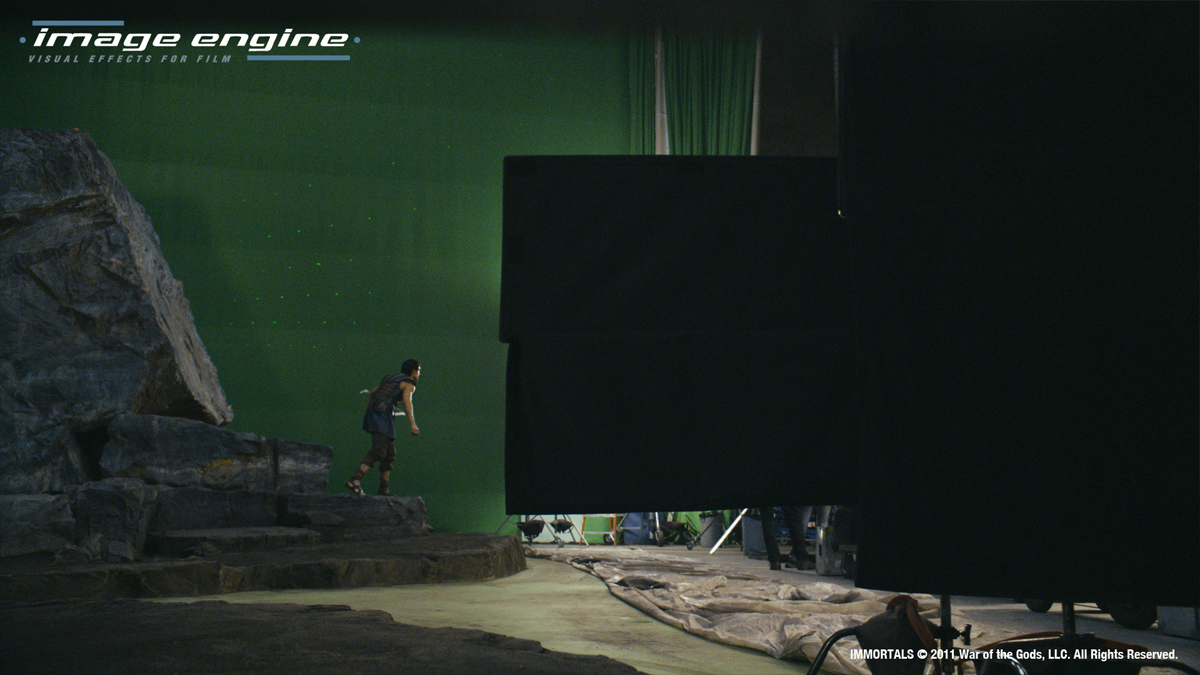
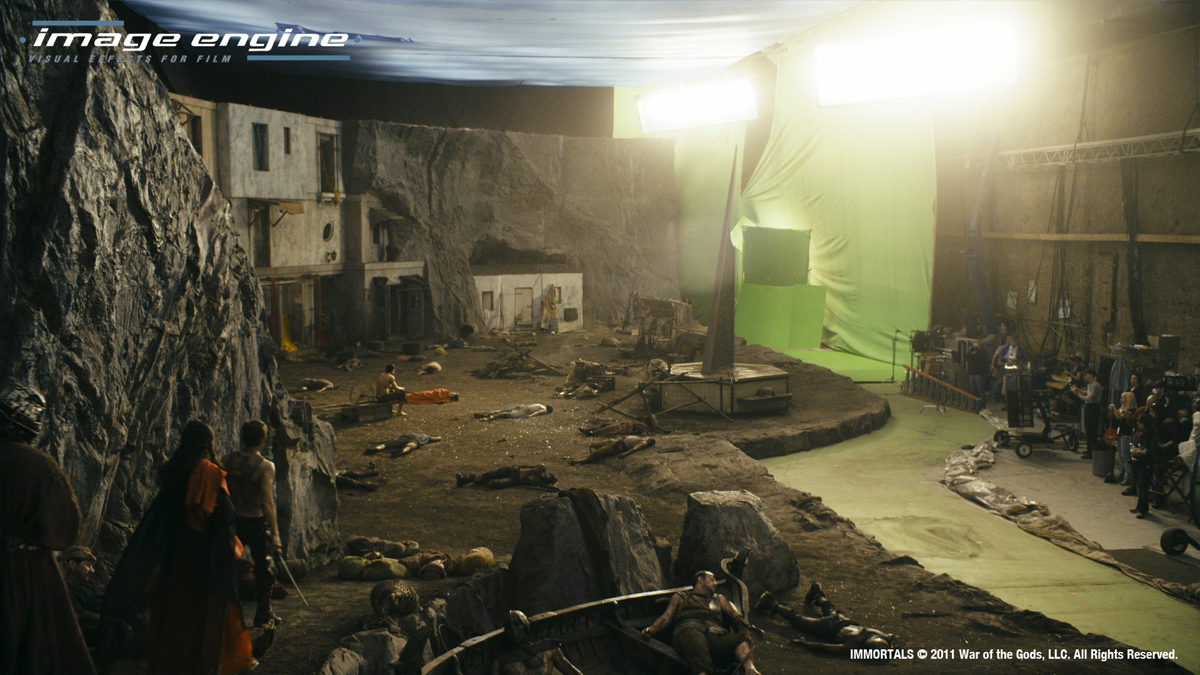
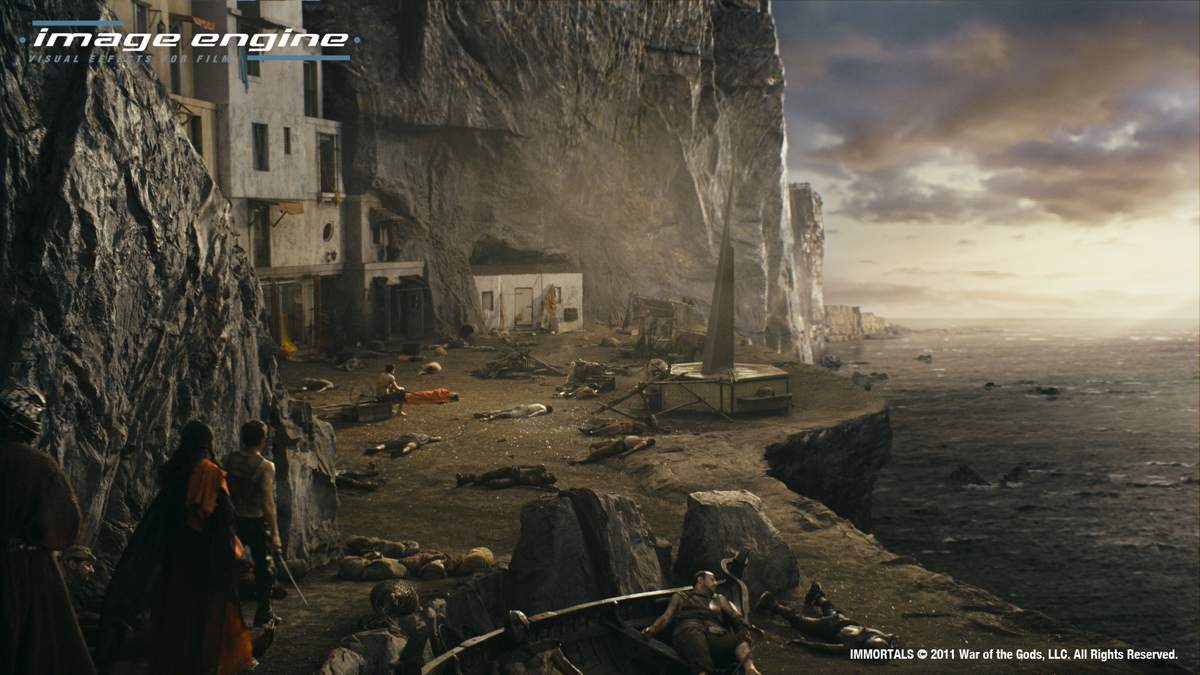
Production used a special setup that would allow the director to shoot these sets against green screens and immediately comp the image over a 3D model of the cliff, placing the real set in proper visual context on the face of the virtual cliff. In this way, Tarsem could choose angles that would frame the real set and the rest of the cliff as it should be seen from each of the three key locations. This 3D model was sent to Image Engine as the basis for the cliff structure we should build [envisioned by Tarsem Singh], along with photos of the rock structures built on-set.
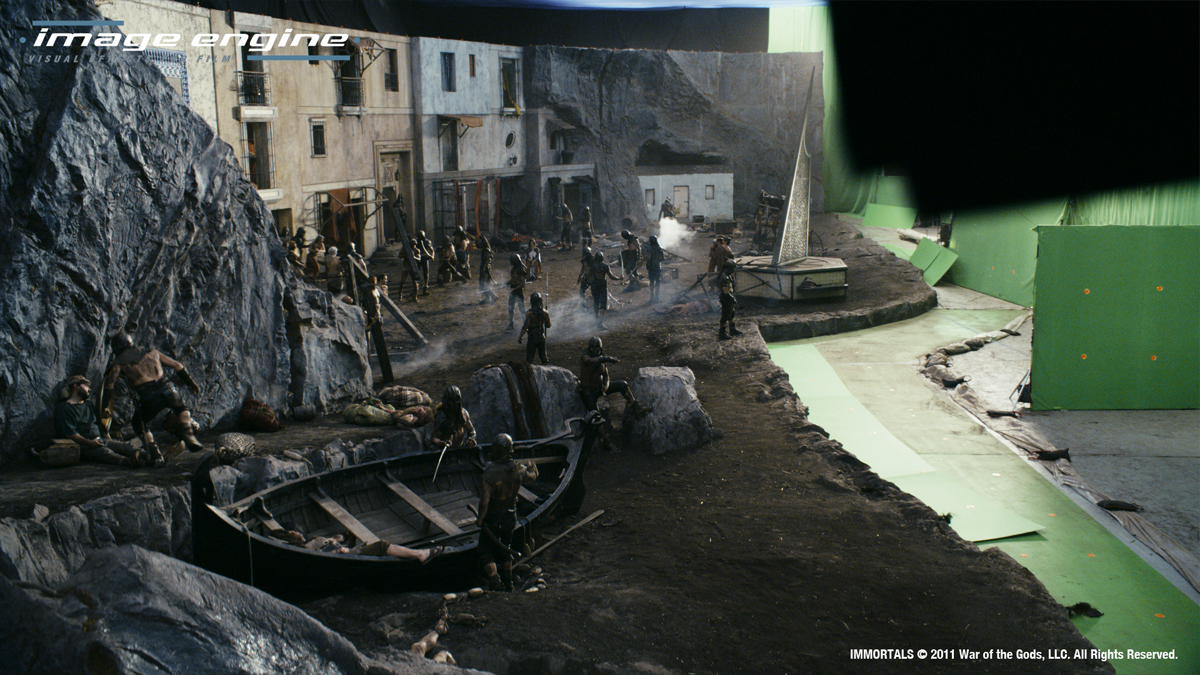


I proceeded to building a more detailed « blocked » version of the same volume in Maya and tagged parts of it with real images of rock features that I thought would fit specific parts of the cliff – broader areas and also the ones closer to the actual sets. The initial blocking of the cliff in Maya was done by simply scaling and piling dozens of polygon cubes together. These served as a « volume guide » for the formations that would bridge each set area and matched the 3D model of the cliff used by Tarsem in his shots. The model ended up spanning roughly half a kilometer within Maya, and it was obvious we would need to segment it to be able to manage the high-resolution version. The cliff face alone was broken-up into 20 parts.


Once we decided how the whole cliff should be segmented, I built cages (simple low-resolution geometry) in Maya that surrounded the cubes that formed each cliff chunk and sent both cage parts and blocks to Zbrush. I shrink-wrapped the cages onto the grouped cubes creating a single mesh that matched the intended volume and could be refined further. For each block, I pushed the subdivisions up to anywhere between 2 and 3 million polygons for initial sculpting. For parts that required the highest amount of detail, I would sculpt further using the HD Geometry feature in Zbrush. I would then export 4K 32-bit displacements of each block and reassemble the whole cliff in Maya to be rendered in 3Delight.


One interesting challenge we had not anticipated, came with the realization that the model used on set as in-camera reference for Tarsem had been deformed and re-arranged almost on a per-shot basis to fit his framing and composition requests. So, our cliff model did not match, initially, any of the reference plates we received from production – even though it had been built based on that same 3D model they used on set! In the end, we had to rig all the 20 cliff parts individually and as a whole to be able to re-shape the entire thing to match the per-shot distortions.


The end result was a clever mix of 3D and matte painting – to tackle the intractable close-ups that were just too extreme for the 3D build to handle (without further cliff segmentation and sculpting); and to handle tweaks and last-minute structural changes requested by the client fast enough to meet the deadlines. »


// Jordan Benwick: Lead Compositor


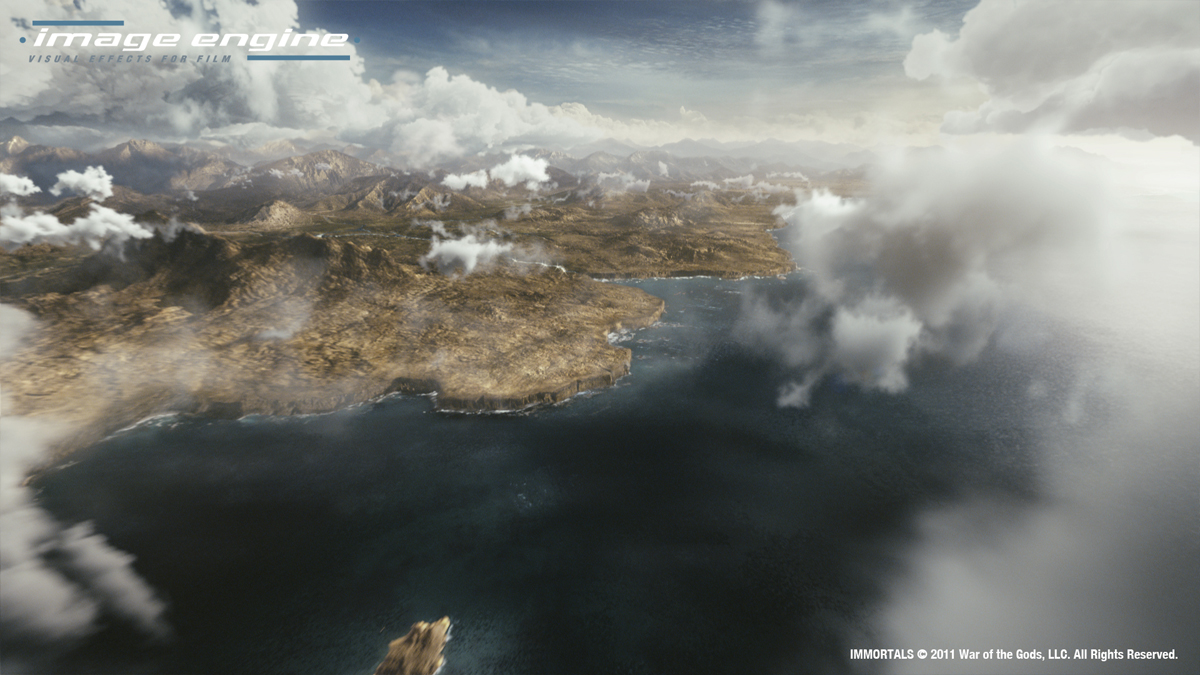
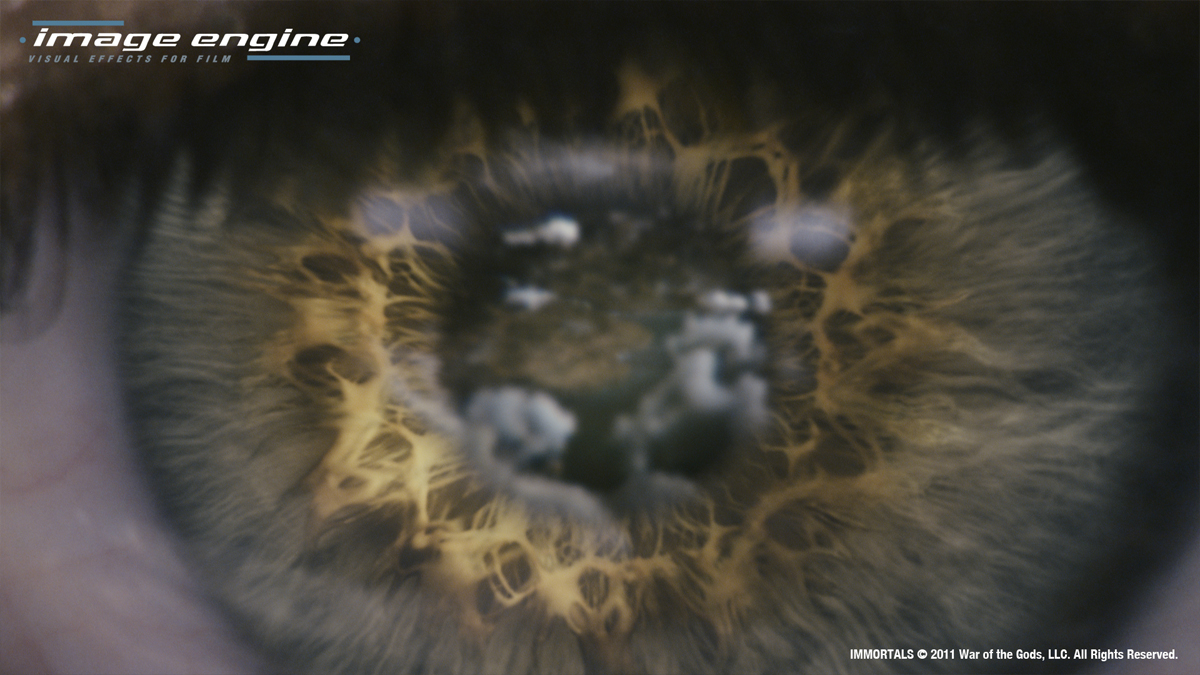
Can you tell us more about the big impressive pull out shot that start at the village and finish in Athena’s eye?

We knew the shot was going to be massive in scope right from the start of the project. We didn’t know just how much of the vista we were going to see, how much would be covered by cloud, etc. We did a lot of concepts and back and forth with the clients. In the end not very much stayed the same as the look of the cliff and terrain was still being worked out.


While that was going on we started on the transitions & plate work. The 1st plate of the village set was shot on a zoom lens, pulling out from long to ~18mm. We had to transition from the zoom out to a dolly out which would fly us up into the heavens, with all the parallax that implies. So in Nuke I projected the plate on the village/cliff geo, but had to get roto of all the soldiers to stand them up on little cards all around the set, and a clean plate underneath them.


We did a lot of rounds of cliff shape and look, so there was a full 3D render of the cliff, but in the end the closer parts of the cliff were largely augmented by matte paintings projected onto the geo. Because we started so close and ended seeing the whole near cliff, there were four matte paintings at 4-6k each inset within the next. A matte painting was also needed for the terrain on top of the cliff.


The base for the ocean was a wave pattern displaced 3D plane, which we re-lit in Nuke based on a sky dome. To that was added a lot of 2d elements, many layers of crashing waves, whitecaps, rocky formations, and more paintings (did you see a trend here?), to really amp up the interest and break up the clean cg feeling. Janeen Elliott did a lot in comp to bring everything up a few levels.


As we were developing the shot, it was clear we would see the same clouds from below as above, which would clearly never work just using photographed clouds on cards. It would also be difficult to find enough aerial views of clouds with the correct lighting and type of cloud. I came up with a method to create clouds using noise patterns and faked lighting, so the shape and lighting could be controlled, and then put them on a stack of cards for each cloud to get a cheap volumetric effect, and even shadows onto the terrain. It was a real hack, and kinda worked! They were limited in that they could only be used for cumulus clouds and not-so-close up.


By far the best clouds were cooked up by Greg Massie in the fx dept, using Houdini. Those are the giant hero thunderhead clouds. The final shot included some of each kind of cloud.


The last piece is the eye transition, which was done in nuke using the plate and, yep, another matte painting. The iris was broken out into several layers and placed in several depths for a bit of parallax to get a sense of overlapping fibers of muscle.


How did you create the set extensions for the tunnel and the monastery?

The monastery shots came to us very late in the production, so we decided we had to be efficient as possible. We came up with a hybrid 3D/matte painting/comp technique, which worked out very well, as we were able to turn around changes quickly, with only 2 artists.


Our 3D artist, Ben Stern, textured and lit the scene as usual, but only rendered 2-5 key frames for each shot that showed the extremes of the camera moves.


In Nuke, I then re-projected the key renders, using the cameras they were rendered through, onto the geo of the monastery. The projections covered all of the monastery that could be seen through the shot camera, so the full frame range could be rendered out of Nuke. It also meant that we could paint and re-texture the monastery in comp. The candelabra flames were 2D elements I shot in the back room of the studio, with some comp tricks to create the light interaction with the candelabras themselves.


// Janeen Elliott: Senior Compositor


Can you tell us in detail the creation of the great shot in which we follow 4 arrows in the air?

I began working on the fly-by shot (where we follow the four flying arrows to the village along the cliff) after it had been initially setup by another artist.


One of the first things I had to do was to tweak the original foreground plate of the hero shooting the final arrow from the bow. The camera move was baked into the plate, and we needed the actor (Henry Cavill) to release the arrow sooner than he was in the plate, so the hand needed to be adjusted. We also needed to lower his arm since the trajectory of the arrow needed to be lower than he was aiming in the plate. Once that was accomplished, the majority of the work I focused on was the cliff face.


We were working with a mix of some CG areas along the cliff face, and some matte painting patches and photographic patches which were projected on to 3D geometry in Nuke. This was a bit of a tricky process in that the geometry onto which we projected our textures needed to simulate the cliff face geometry as best as possible in order to avoid pinching and stretching as the camera went past. We found that we couldn’t use the full CG geo that 3D had used as it was simply too heavy in Nuke.


Instead, it was more efficient to use cards in areas that we were updating. Also, we had to use higher resolution matte paintings and photographs the closer the camera got to the cliff face, so there were quite a few cards used along the fly-by. Projections in Nuke also helped us where we had notes to adjust the look of the village. Certain buildings needed to be changed for color, or to add fire scorch marks, and we were able to use Nuke’s projections with rotoshapes to easily track the rotoshapes to the desired building to make the change quickly.


Also of course, this helped in blending in the CG buildings with the live action ones of the plate where the actors where shot. Projections were used again in the water area as well. We used them to project clips of live action waves crashing along the cliff face, and the rocky outcroppings.


I also applied the established magic arrow look to the four flying arrows as well as created the look for the impact that those arrows would have upon their targets. Of course there was quite a bit of overall adjustment to color to all aspects of the shot, and the final god rays were also applied as a final touch.


A big thanks for your time.


// EN SAVOIR PLUS ?


- Image Engine: Site officiel d’Image Engine.


© Vincent Frei – The Art of VFX – 2011


TOWER HEIST: Mark Russell – Superviseur VFX de la Production

TOWER HEIST: Mark Russell – Superviseur VFX de la Production:


How did you get involved on this project?

I met Brett Ratner just as I was finishing THE ADJUSTMENT BUREAU. The producer Bill Carraro was the same for both films. They started pre-production right next to my office, so it made it pretty easy to communicate.


How was your collaboration with director Brett Ratner?

Brett really relies on his team to bring their ideas to the table. He really allowed me to create some interesting things and realize my ideas.


What was the real size of the set for the penthouse and the pool on top of it?

Kristie Zea, the production designer, and Nick Lundy, the art director, modeled the penthouse set on a real penthouse apartment in the Trump International Hotel and tower. The scale and shape of our set was nearly the same. We did have to make it a bit smaller because we couldn’t find an available stage in NY that could hold such a large apartment. The pool was a complete fabrication, so we made a pool that seemed big enough to be a lap pool and would look good on the roof.


How did you take the references and the elements for the environment?

The BG elements were captured a number of different ways. First, we shot a very very high res panoramic image for use as a printed translight backing during photography. That same image was then used as the digital background in most of the scenes from the apartment. We supplemented the translight image with a combination of images captured with an array of Canon 7D cameras shooting both stills and video from the same place. Also, we shot a number of plates during the Thanksgiving Day parade on film and again with the Canon array.


Have you considered doing the backgrounds shots with the retro-projection technique?

During pre-production we (Brett, Kristie, Dante Spinotti (cinematographer) and I) decided that we wanted the flexibility of a greenscreen for the background for a number of reasons. First, we felt that the amount of parallax that we would get from the multiple steady-cam shots would look much better with a 2-1/2D image rather that a flat backing or a projected image. Also, the sheer scale and scope of the views was too large to realistically cover the set, so we would have been supplementing much of the BG anyway, and I felt it would be cleaner to replace the BG as a whole. Finally, Dante really wanted each of the scenes to feel like different times of day, and we knew it would be much more difficult to achieve that in camera with one backing.


Can you tell us more about the sequence in which Eddie Murphy is moving through the elevator shaft?

The elevator shaft was tricky in that it’s not a very long set of shots, but yet it was an enormous physical and CG build. The art department built a three story section of the elevator shaft with a hotel hallway attached (20 feet in the air) that was used for in the shots of the car getting dropped into the shaft and the guys arriving at the bottom and top of the shaft. It was also used in the shots of Eddie climbing out of the elevator which we extended to add peril. John Bair and his team at Phosphene build a CG version of the shaft and the elevator cars that we used in all of the shots of the elevator moving and anything where we saw more than 2 floors of elevator in the BG.


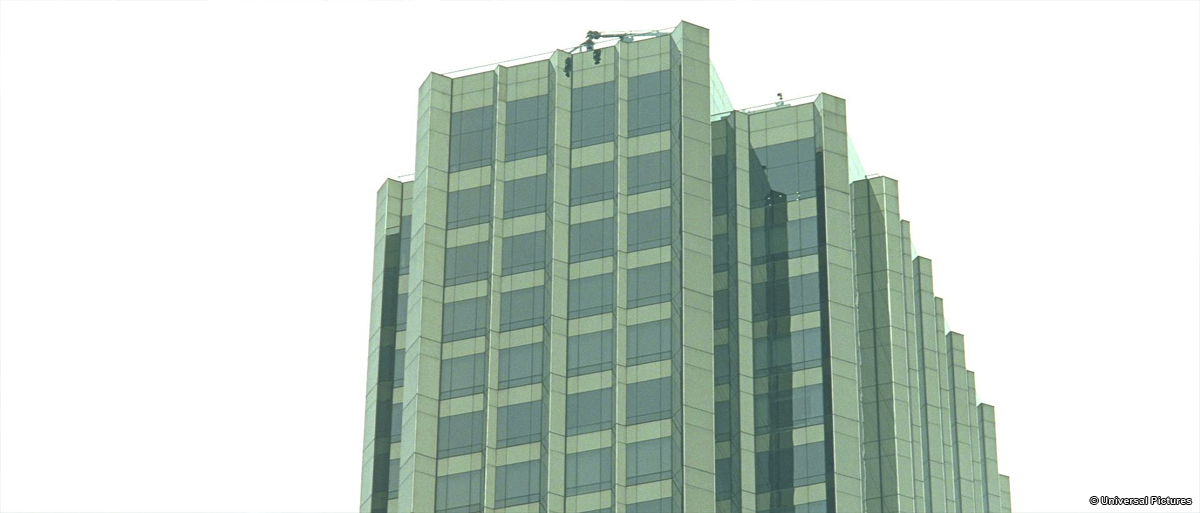
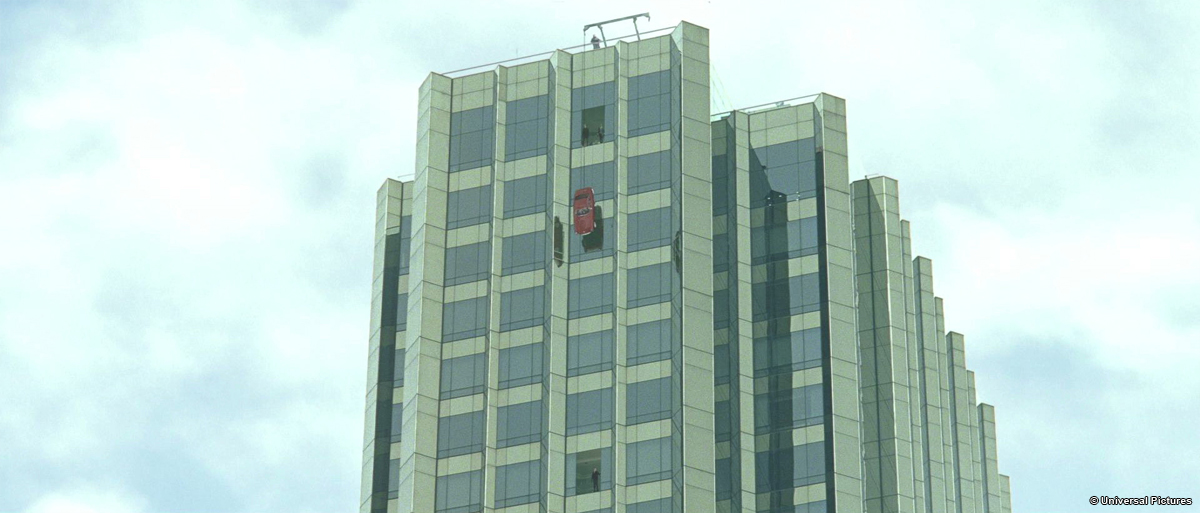
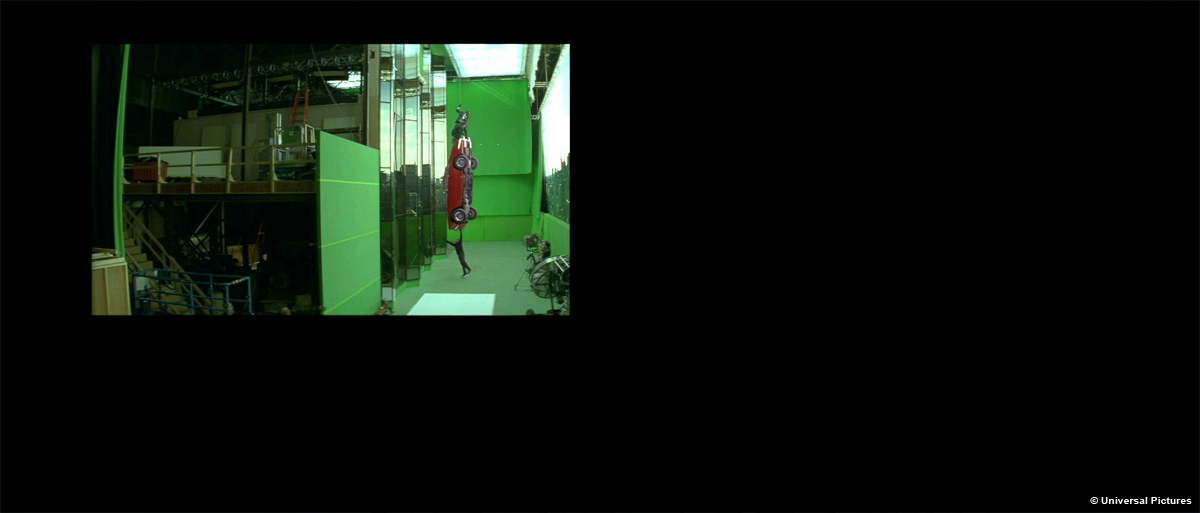
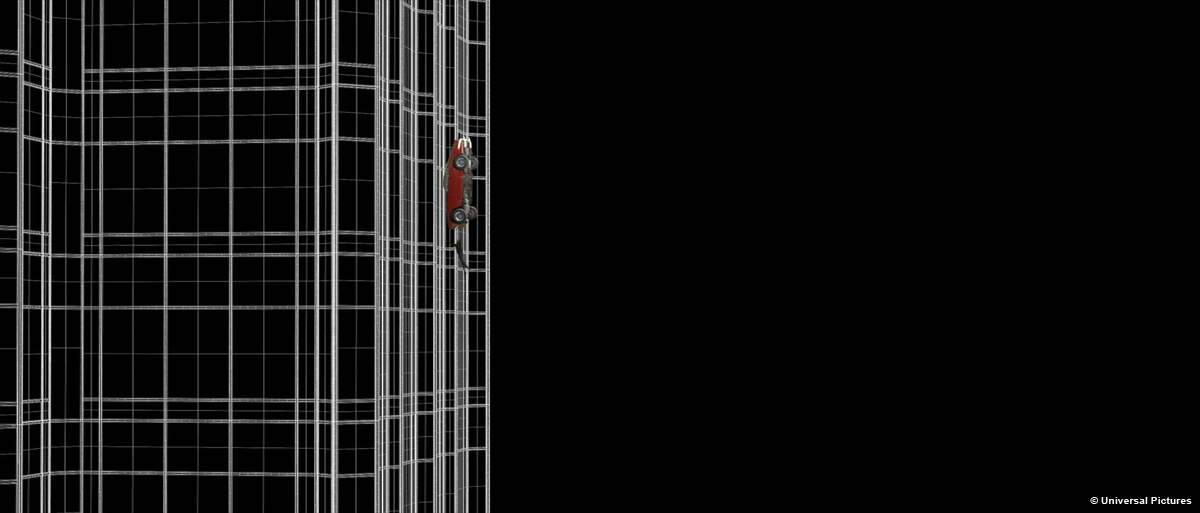
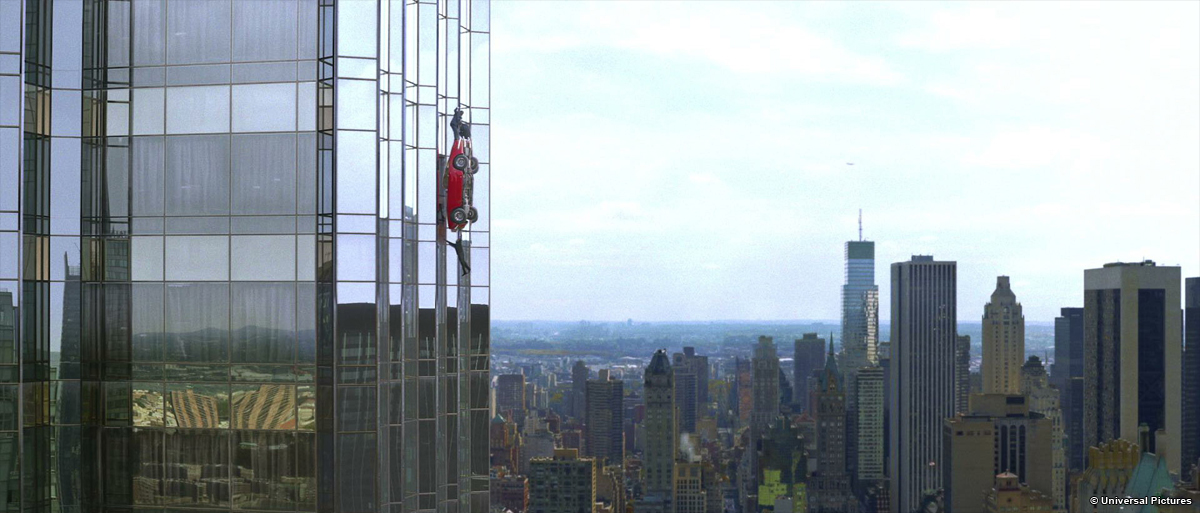
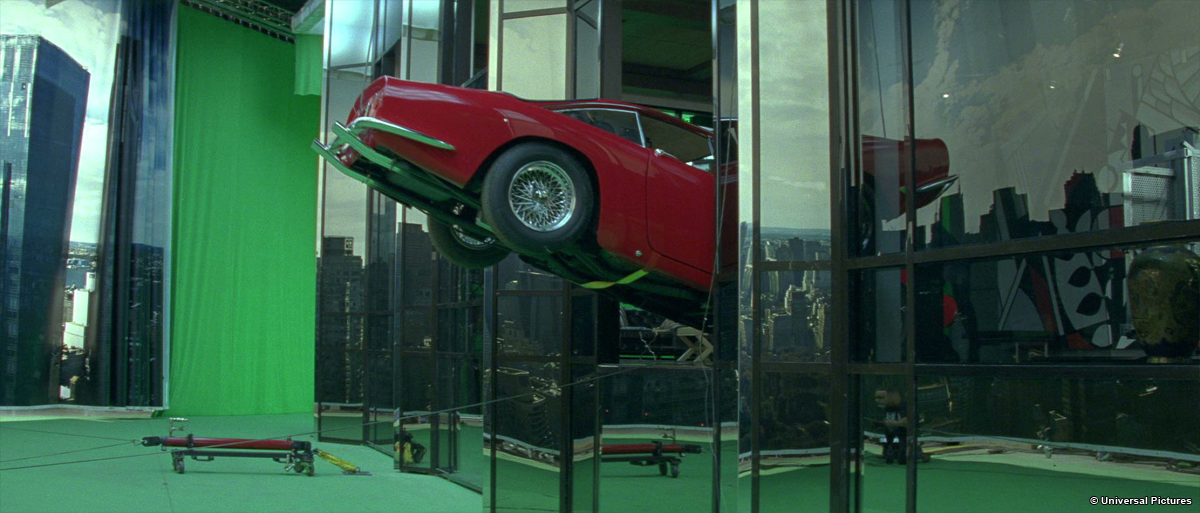
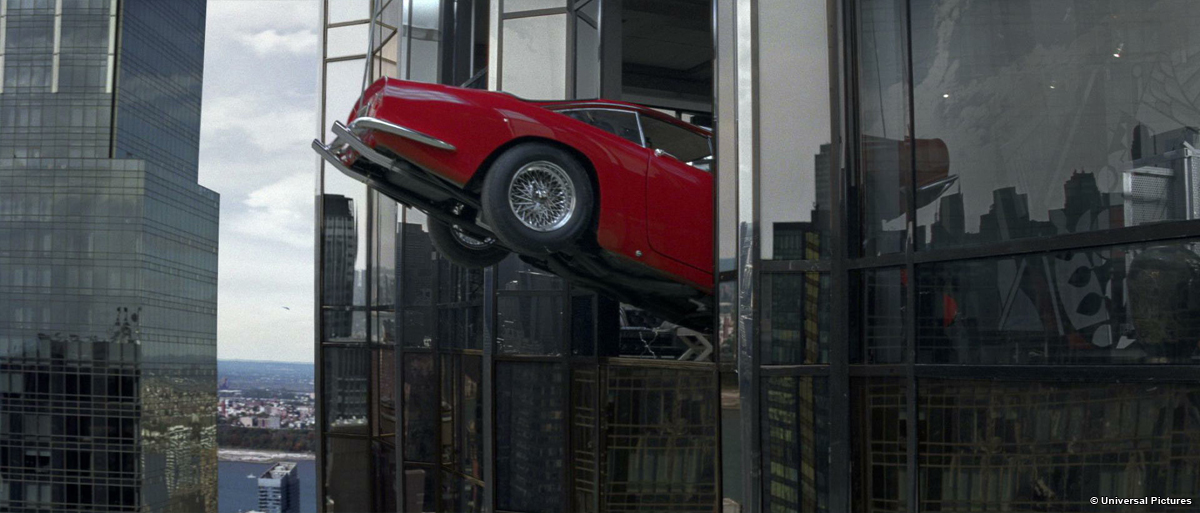
How have you designed and created the shots in which Ferrari is suspended in the void?

These shots were story-boarded by Brett and an artist named Dave Cooney. I took the boards to Gravity, and we made a 3D previs of the entire sequence with the car and the guys outside the building. In doing that, we found that we needed some additional shots, so we created a number of helicopter-type shots that we could do in full CG which gave the scene a bit more scale and danger. On the set, we used the 3D previs as our shooting guide on a shot by shot basis. It was very helpful.


Can you tell us more about the shots with the team and the Ferrari in the elevator shaft?

Essentially the scenes were divided into two categories: things we could shoot in the practical shaft and things we needed to shoot on greenscreen. We shot all of the actors the top of an elevator cab against green screen for anything where the cab was traveling up or down the shaft. Shots were they elevator cab was slowing to a stop or not moving at all were done on the physical set. Steve Kershoff, our amazing special effects coordinator, built a moving platform that could hold the actors and the Ferrari, so that the shots where they are slowly approaching the roof of the shaft are mostly in camera. The platform didn’t move very fast, so anything that needed to appear fast was shot on the greenscreen.


Did you create digital doubles for the wide shots showing actors on the Ferrari?

Yuval Levy and the 3D team at Gravity made digital double for a number of the wide shots with Ben, Eddie and Matthew hanging on the Ferrari.


Have you done something on the Thanksgiving Day Parade?

We had a team of 7 cameras shooting various elements and shots during the Thanksgiving Day parade. It was a crazy day, because we really had to rely on what each team could capture on their own. We could communicate by radio, but we couldn’t really get to one another once the parade had started. I was very specific about the types of shots I was hoping to get from each of the positions. The most important pieces for me on the day were the ones shot from the roof of The Tower. It was difficult because we were shooting the BG plates before we shot any of the FG pieces, so I was guessing at a lot of what were going to need when we got into post, and of course, we only had on chance.


Can you tell us how you chose the different vendors and distribute the shots?

I tried to choose vendors on their skills as well as their capacities. Each of our vendors has specific strengths, and I really tried to play to those as best as possible. It was a very big show for NY, and I wanted to make sure that no one vendor got too bogged down. It was a bit challenging in the end because Brett was requesting a lot of minute changes up until the very end that really cramped our pipeline. We had to move some things around at the end in order to make sure that we could address all of Brett’s notes.


How was the collaboration with the different VFX Supervisors?

I really enjoyed working with everyone. It’s a great experience for me to see how different people approach similar work. Jim Rider, Greg Liegey, John Bair and Randy Balsmeyer and the other facility guys each came at things from a slightly different perspective and it’s exciting for me to work with them. I also had the pleasure of working with a Adam Howard, Mike Fink and John Bruno who consulted for a few weeks on the film. Each of us had a slightly different focus, and it was great to work together with all of them.


What was the biggest challenge on this project and how did you achieve it?

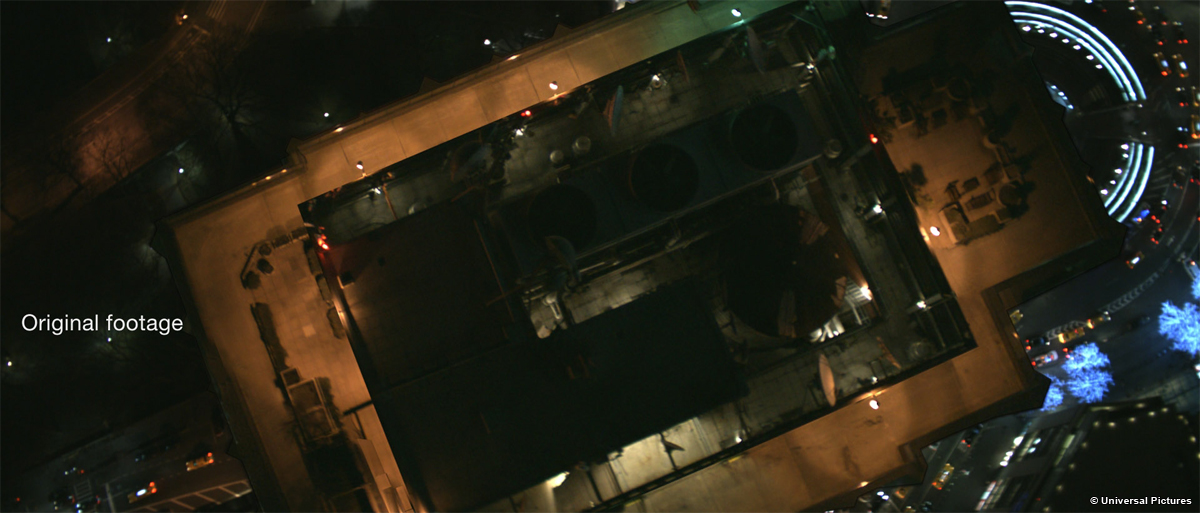
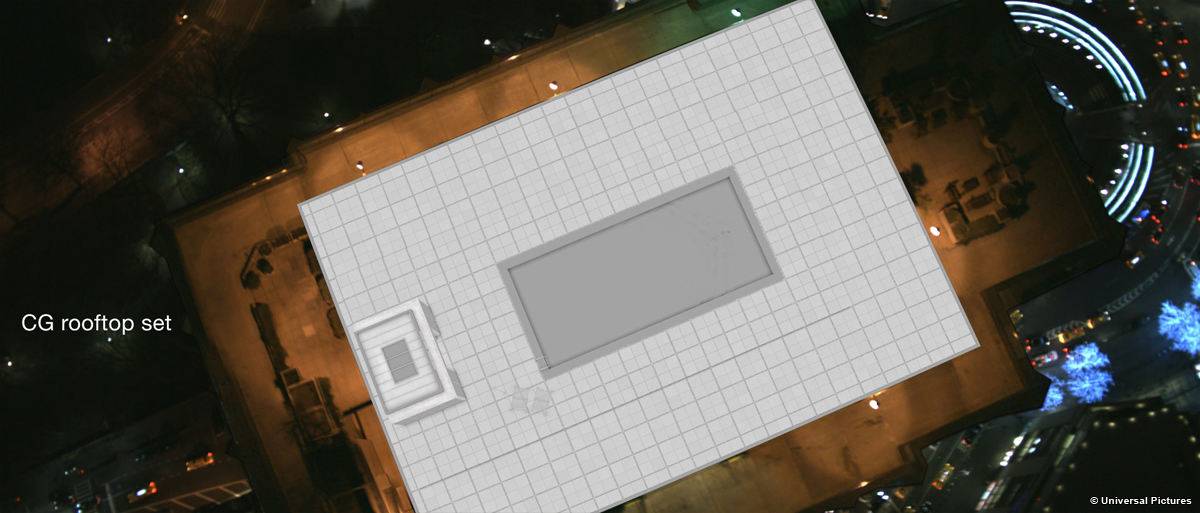
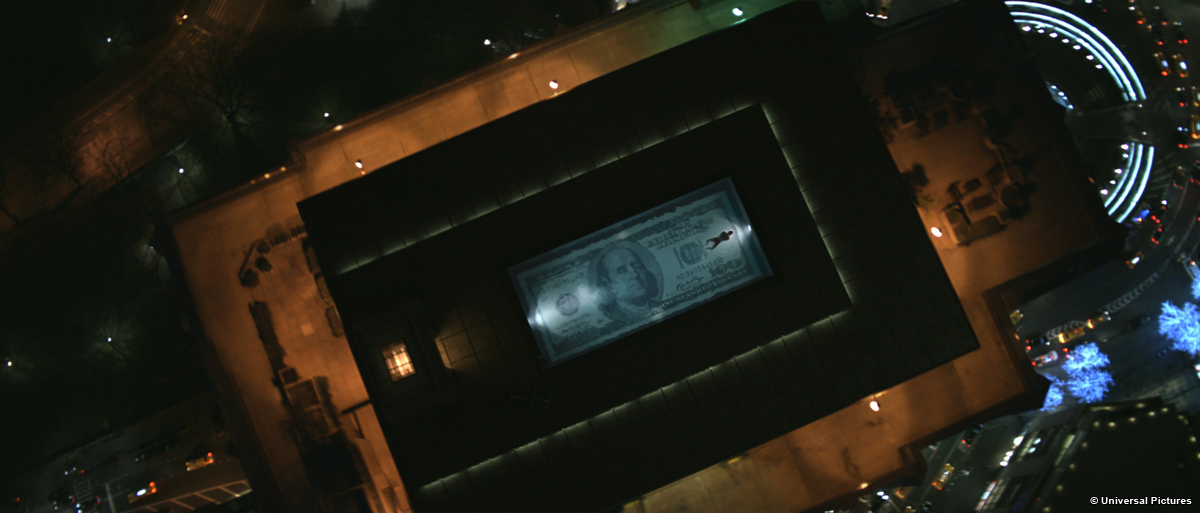
The biggest single challenge was the opening shot of the film. We start close on the face of Benjamin Franklin from a $100 bill, then the camera pulls up to reveal a swimmer in a pool with the bill on the bottom. It continues to pull up until we see that the pool is on the roof of The Tower until we finally tilt up to show the city of New York. This shot was also the most fun for me. Working again with John Bair and Phosphene, we pre-visualized the entire scene first. I planned with the art and camera departments which elements I would need to be built and shot. We built a real pool with a 100 dollar bill printed on the bottom, and we shot it on a stage. Then Phosphene combined that with a CG pool and rooftop that hooked into some aerial photography that I was able to shoot above the Tower. It was one of the shots where the planning and fate were all working for us. Everything came together beautifully.


Was there a shot or a sequence that prevented you from sleep?

There were a number of shots and sequences that kept me from sleeping. The penthouse apartment scenes were the ones that caused me the most stress. We had a very difficult time locking down the balance between the FG and the BG to a place where Brett was happy with it. Ultimately the film looks beautiful and I’m very proud of the work, but it was not an easy process finding the right balance of brightness, contrast, focus and sky detail.


What do you keep from this experience?

I learned a great deal from TOWER HEIST, but mostly I take away huge respect for the artists in NY. They are incredibly dedicated and driven. They did whatever it took to get the job done.


How long have you worked on this film?

I worked on TOWER HEIST for about 15 months.


How many shots have you done?

There are 535 shots that ended up in the film.


What was the size of your team?

I had a producer, data wrangler and coordinator. Then two VFX editors. There were six of us in all.


What is your next project?

I don’t know yet. I’ve been enjoying some down time.


A big thanks for your time.


// EN SAVOIR PLUS ?


- Mark Russell: Site internet de Mark Russell.


© Vincent Frei – The Art of VFX – 2011